Google PageSpeed Insights Definitely a useful tool for webmasters, developers and website owners of all types. However, we recognize that a lot of people spend hours obsessing over optimizing their websites, trying and scoring 100/100 points on this test.
The truth is that this is not how Google PageSpeed Insights is used, nor is it a worthwhile pursuit. When you focus on implementing platform recommendations instead of engaging the number at the top of the page, you will create more benefits for your site.
This post is a comprehensive guide to using Google PageSpeed Insights to your best advantage. We will cover how Google uses your scores, as well as how to combine the suggestions you receive.
Start!
Introducing Google PageSpeed Insights
If you are not familiar with Google PageSpeed Insights , then it's a tool used to test website performance. You can enter any URL and analyze it:

Detailed information about Google PageSpeed
Google then gives a total score out of 100 for the website you have tested, based on some best practices on performance optimization:
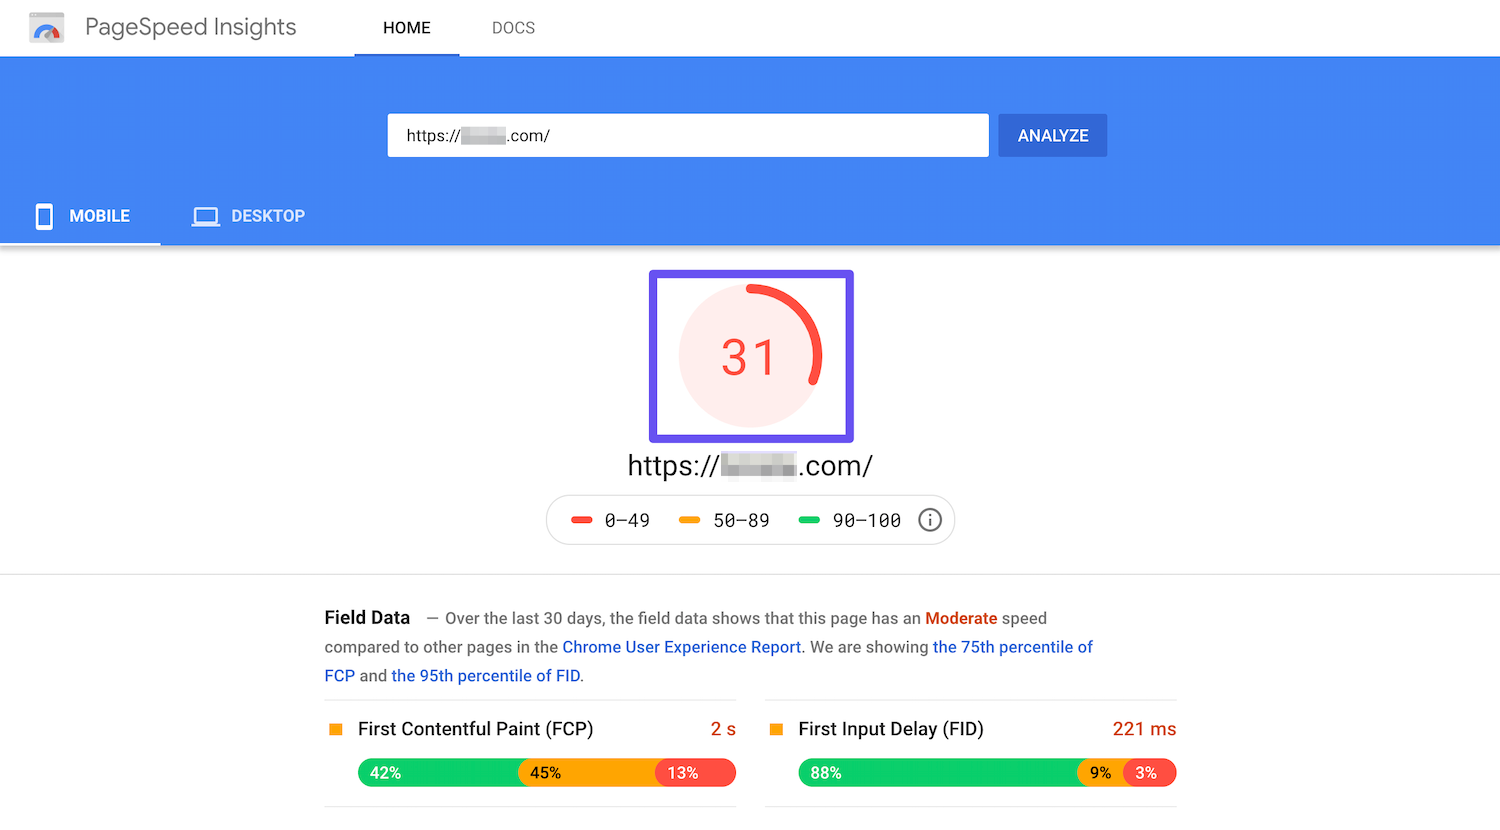
Google PageSpeed Insights score
Along with this result, you will also see some suggestions from Google on how to improve your performance (and so does the PageSpeed Insights score):
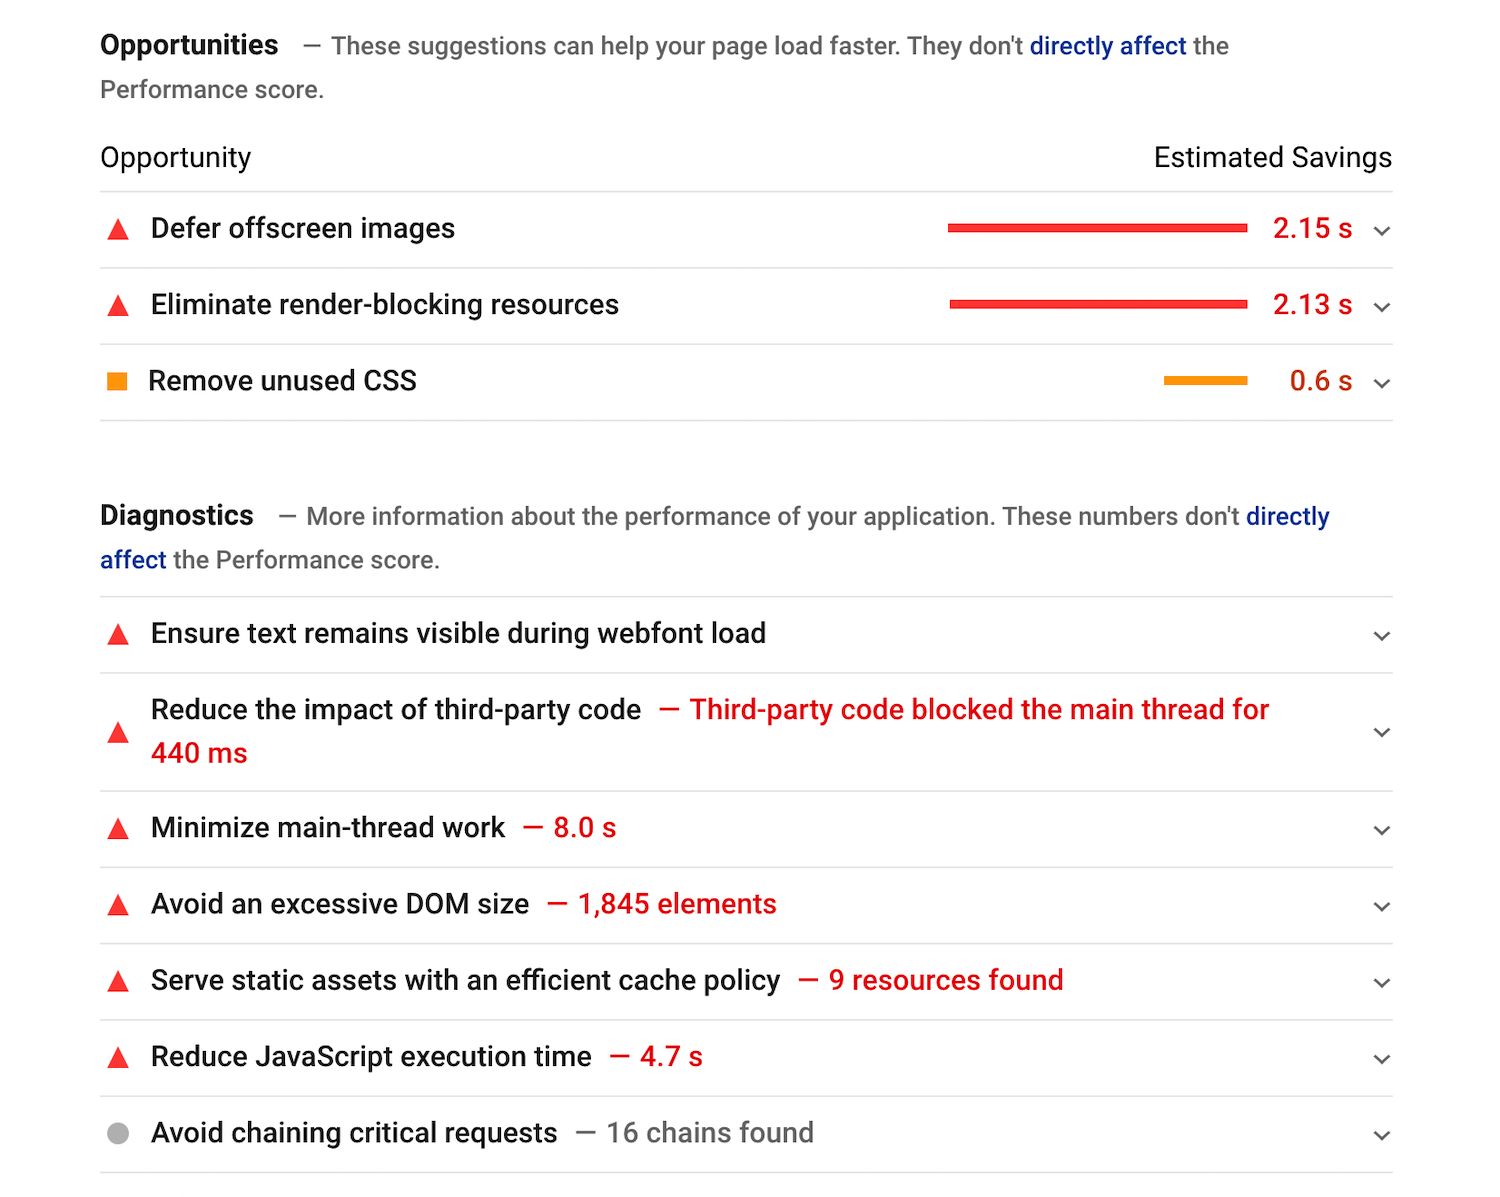
Recommend details about Google PageSpeed
Since 2018, the PageSpeed Insights score is calculated through Google Lighthouse , Google's open source, automated tool to improve the overall quality of web pages. The platform can evaluate all kinds of factors, including performance, accessibility, progressive web applications, and more.
To see the Lighthouse's comprehensive review of your site you can use Google Measurement tool :

Google Webmasters Measure audit tool
In addition to performing a performance audit like a Google PageSpeed Insights run, you'll get points for accessibility, best practices, and Search engine optimization (SEO) .
The truth about scoring 100/100 in Google PageSpeed Insights
As we mentioned at the beginning of this post, we see many website owners and developers obsessed about achieving a perfect PageSpeed Insights score. Unfortunately, these people tend to overlook the more important aspect of the test results: recommendations.
While you should definitely try to improve your site's load time as much as possible, getting 100/100 in Google PageSpeed Insights really doesn't matter. For starters, it's not even a performance test.
Unlike PageSpeed Insights, Pingdom Tools allows you to test your site performance from many different locations:
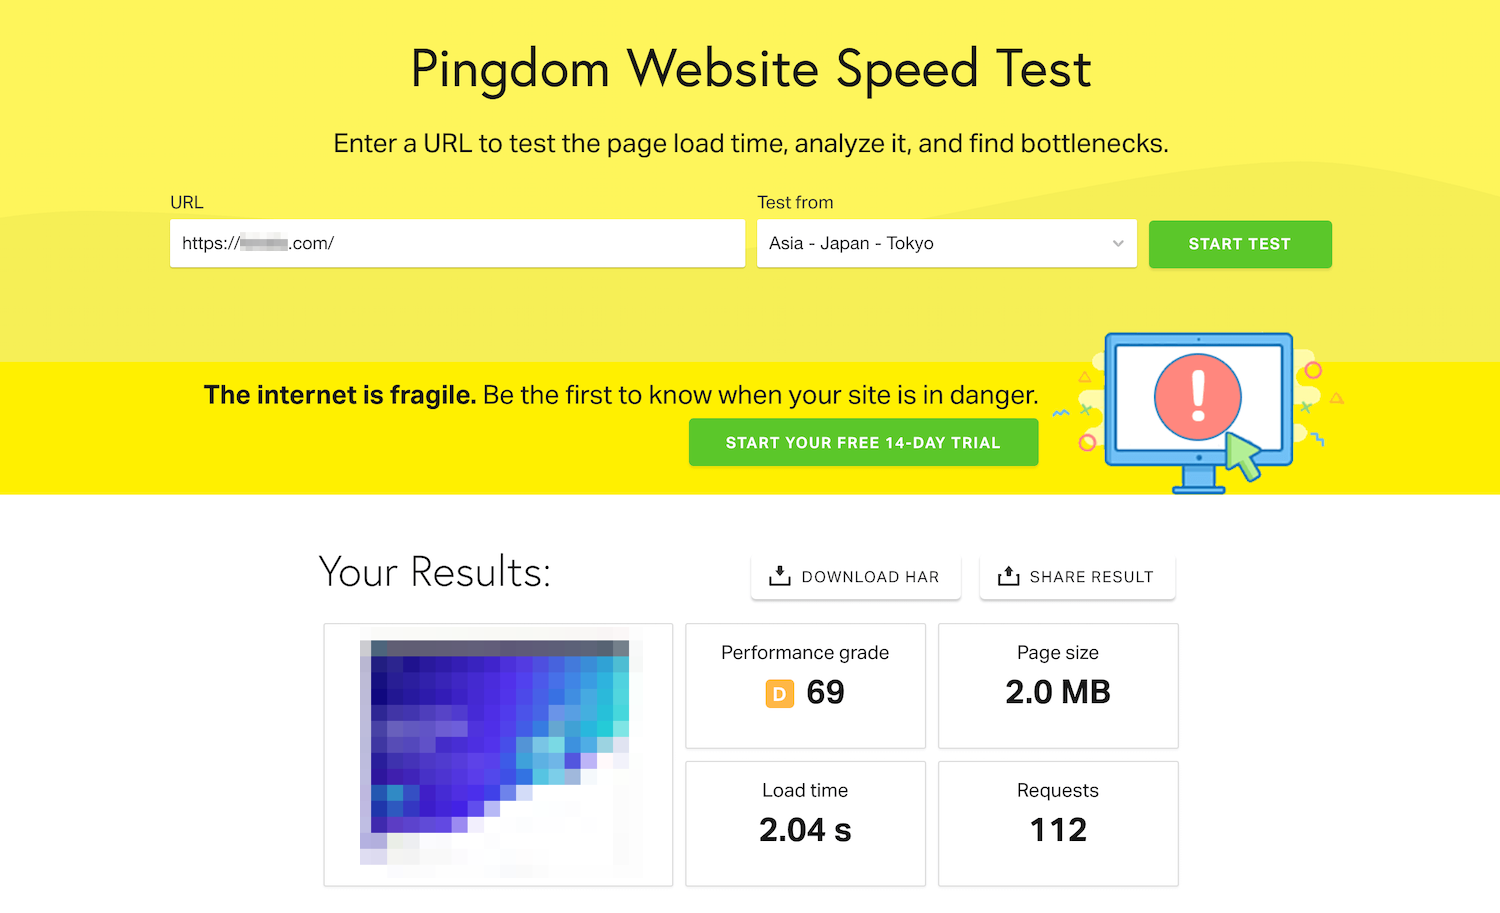
Speed test results of the Pingdom Tool
You can also run tests on platforms like GTmetrix (combining your scores from PageSpeed Insights and YSlow ) and WebPageTest . Most likely, your scores on these different tools will not match exactly, which shows you how arbitrary these numbers may be.
What really matters is the actual speed of your site. To put that into perspective, we saw sites with an average loading time of less than 500 milliseconds (extremely fast!) With no score of 100/100 on PageSpeed Insights.
The true purpose of testing your site performance with Google PageSpeed Insights is not to achieve a high score. Instead, it is to find problematic points on your site, so that you can optimize them and reduce both actual and actual load times of your website.
How Google uses details about page speed
In addition to affecting your site's User Experience (UX), performance also plays a role in SEO. Given that PageSpeed Insights is run by the world's largest and most popular search engine, the reason is that your score may have an impact on the Search Engine Results Page (SERP) rankings. (at least on Google itself).
The fact is that Google doesn't use PageSpeed Insights to determine rankings - categories. Site speed is a ranking factor, simple and simple. Your performance test score can give you a pretty good idea of where you stand on that front.
However, Google will consider more than just the number in the circle at the top of your PageSpeed results. Hitting 100/100 will not guarantee you a top position on the SERPs.
That said, you can still set the PageSpeed Insights results to improve your SEO. For example, since 2018, Mobile page speed is a ranking factor by Google. You will notice that your performance test provides data for both desktop and mobile versions of your website:
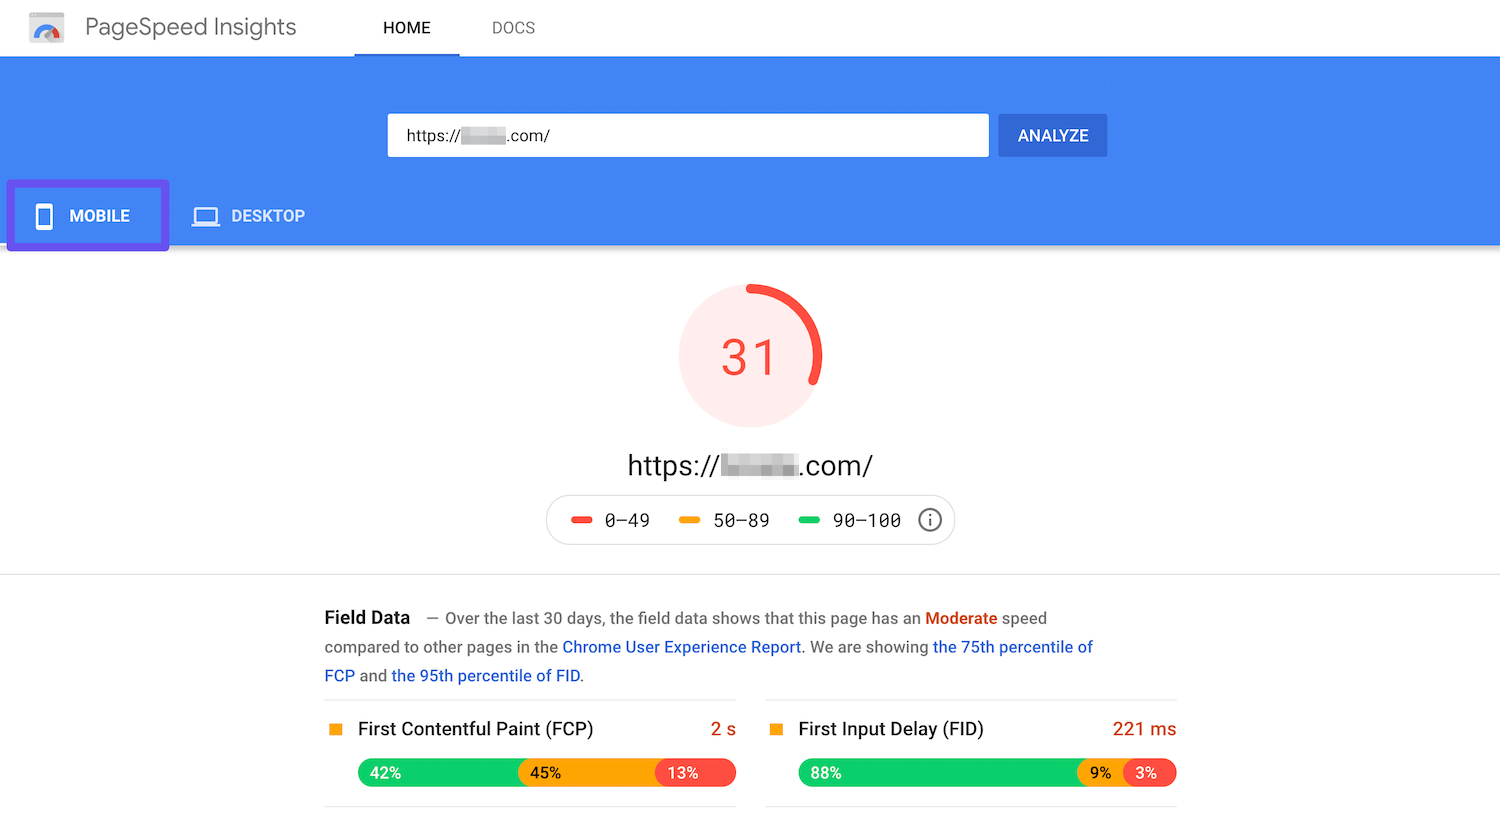
Mobile tab in Google PageSpeed Insights
Because more than 73 percent of mobile internet users think they've encountered a site that takes too long to load, the information in the Google PageSpeed Insights Mobile tab is invaluable. Using the suggestions here to reduce loading time on smartphones and other devices will give you a competitive advantage.
Recommend details about Google PageSpeed (24 ways to improve performance)
We talked a lot about Google PageSpeed Insights recommendations in this post. They are the true meat of your performance test results and are far more valuable than your actual score. That is why we dedicate the rest of this post to them.
However, before we dive into individual recommendations, you'll need to understand the difference between Field Data and your Lab Data. The former compares your site to others in the Chrome User Experience Report in the last 30 days.
There are also two charts showing where Firstr Contentful Paint medium (FCP) and Input lag (FID) your average
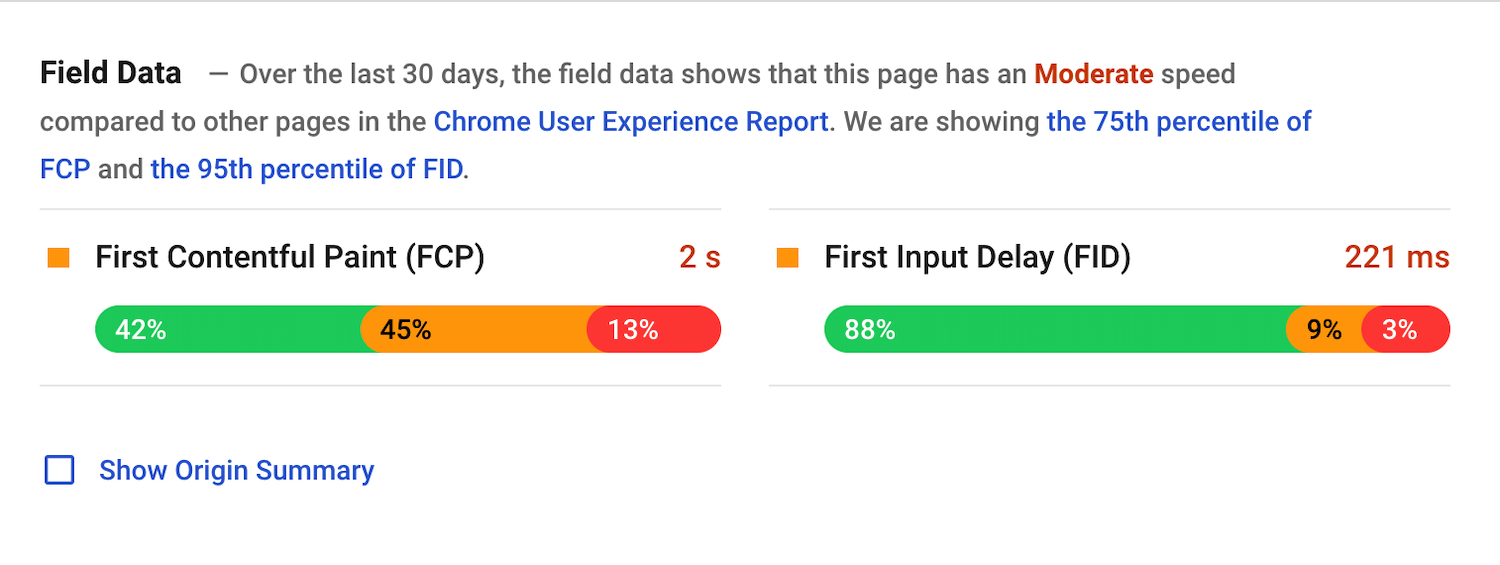
Real Google PageSpeed data
In the image above, the FCP of our website is equivalent to 45 percent of the websites in the 75th percentile, and our FID is equivalent to 9 percent of the 95th percentile.
Lab Data displays specific data for loading simulation page:

Google PageSpeed Insights lab data
You will notice that our Field Data and Laboratory Data does not match exactly . That's perfectly normal. Lab data are generated under fixed conditions, while data fields use actual loading speed collected over time.
When reviewed in combination, Field Data and Lab Data give you an idea of the actual load time of your site. As we mentioned earlier, this is even more important than your overall PageSpeed score, so you'll want to pay attention to these numbers.
Once you've reviewed this information, it's time to start improving your site performance with Google PageSpeed suggestions.
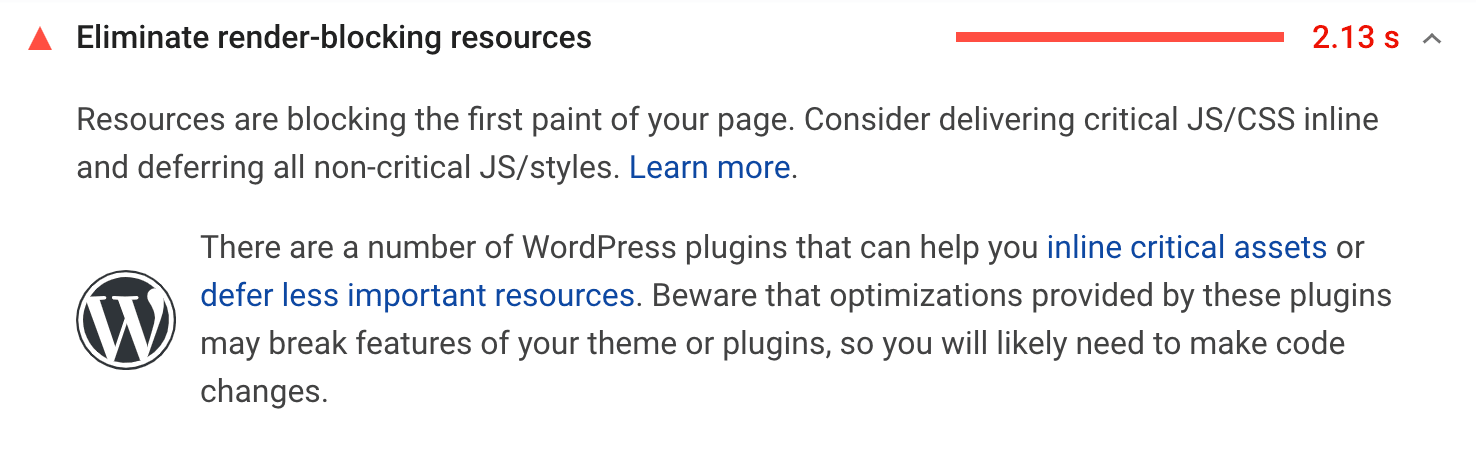
1. Remove rendering blocking resources
One of the popular suggestions from Google PageSpeed Insights is Remove display blocking resources :
Eliminate display blocking resource suggestions
This refers to the JavaScript and CSS scripts that are preventing your page from loading quickly. The visitor's browser must download and process these files before it can display the rest of the page, so many of them 'above the fold' can have a negative effect. to the speed of your website.
- If you do not have a lot of JavaScript or CSS, you can inline them to get rid of this warning. This process involves incorporating your JavaScript and / or CSS into your HTML file. You can do this with a plugin like Autoptimize . However, this is really only valid for very small sites. Most WordPress websites have enough JavaScript that this method can really slow you down.
- Another option is delay your JavaScript . This property downloads your JavaScript file during HTML parsing, but only executes it after the parsing is completed. Additionally, scripts with this property execute in the order they appear on the page.
You will find a list of the resources most affected by this issue below the proposal in your PageSpeed results.
2. Avoid stringing important requirements
Concept sequence important requirements must do with the Important rendering path (CRP) and how the browser loads your pages. Some elements - such as the JavaScript and CSS we discussed above - must be completely loaded before your page will show.
As part of this proposal, Google PageSpeed Insights will show you the series of requests on the page you are analyzing:
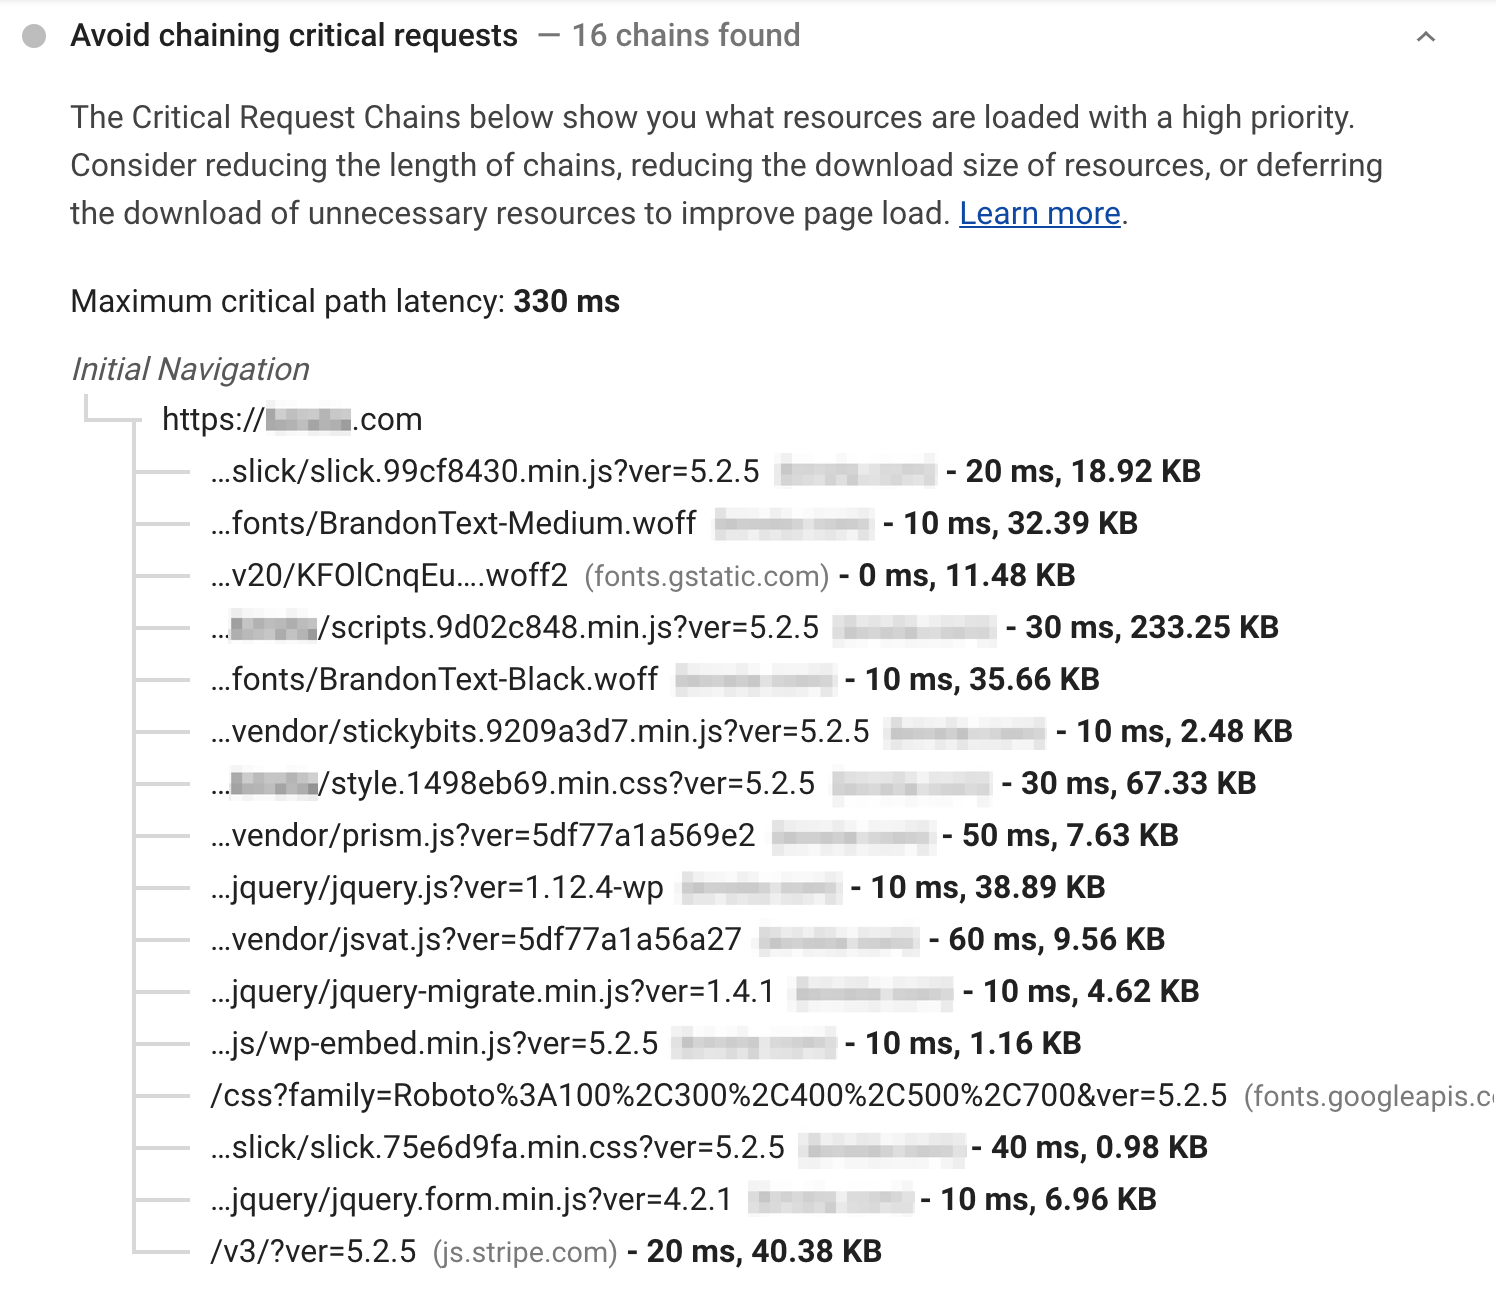
Avoid stringing important requests
This diagram will show you a series of dependent requests that must be made before your page is displayed. It will also tell you the size of each resource. Ideally, you want to minimize the number of dependency requests, as well as their size.
Some methods to accomplish these goals are mentioned in the other recommendations discussed in this article, including:
- Remove resources blocking rendering
- Defer screen images
- Minimize CSS and JavaScript
It is important to note that there are not some important request chains that you need to work on. Google PageSpeed Insights does not count this audit as 'passed' or 'unsuccessful', unlike many other recommendations. This information is simply available to help you improve download times.
3. Keep the required quantity low and the transfer size small
The more browser requests to load your pages and the more resources your server returns, the longer your site will load. Therefore, it is reasonable that Google will advise you to minimize the number of mandatory requests and reduce the size of your resources.
Like the proposal Avoid sequencing important request proposals, this does not lead to ‘pass’ or ‘fail’. Instead, you only need to see a list of the number of requests made and their sizes:

Keep the number of requests low and transfer the recommended size small
There is no ideal number or maximum size to keep in mind. Instead, Google recommends that you set these standards yourself by creating a performance budget. This is a set of defined goals that can relate to aspects such as:
- Maximum image size
- Number of web fonts used
- How many external resources you call
- The size of the script and the frame
Creating a performance budget provides you with a set of standards for self-responsibility. When you exceed your budget, you can make decisions about removing or optimizing resources to adhere to predefined guidelines. You can Find out more in this article in Google's own guide.
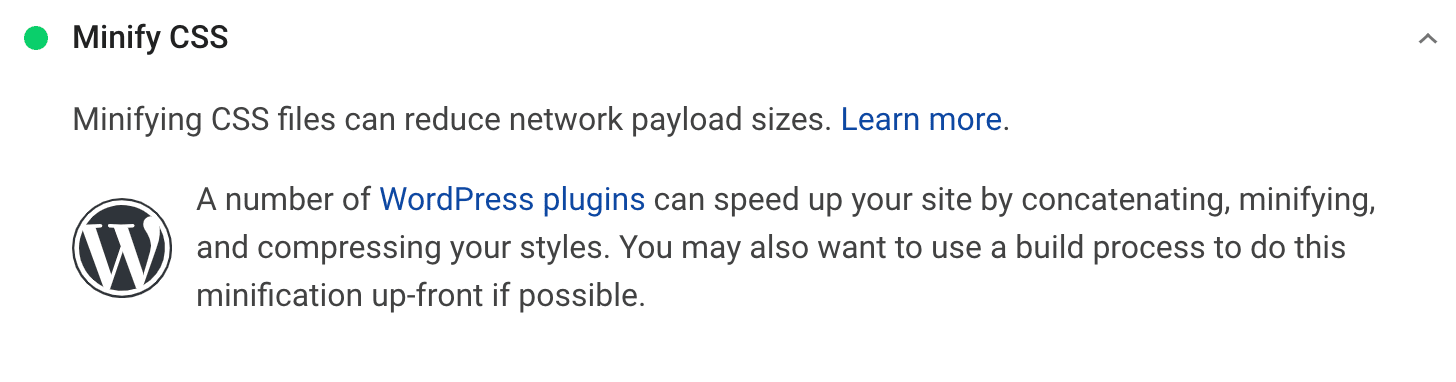
4. Minimize CSS
CSS files are often larger than necessary, to make them easier to read. They can include various shipping profits and unnecessary space for computers to understand their content.
Minimizing your CSS is the process of condensing your files by eliminating unnecessary characters, spaces and duplicates. Google recommends this practice because it reduces the size of your CSS file and can therefore improve loading speed:
Minimize CSS recommendations
We recommend using a plugin like Auto-Maximize or WP Rocket to shrink your CSS files.
5. Minimize JavaScript
Just as you can reduce the size of the CSS file through minimizing, the same thing applies to your JavaScript files:
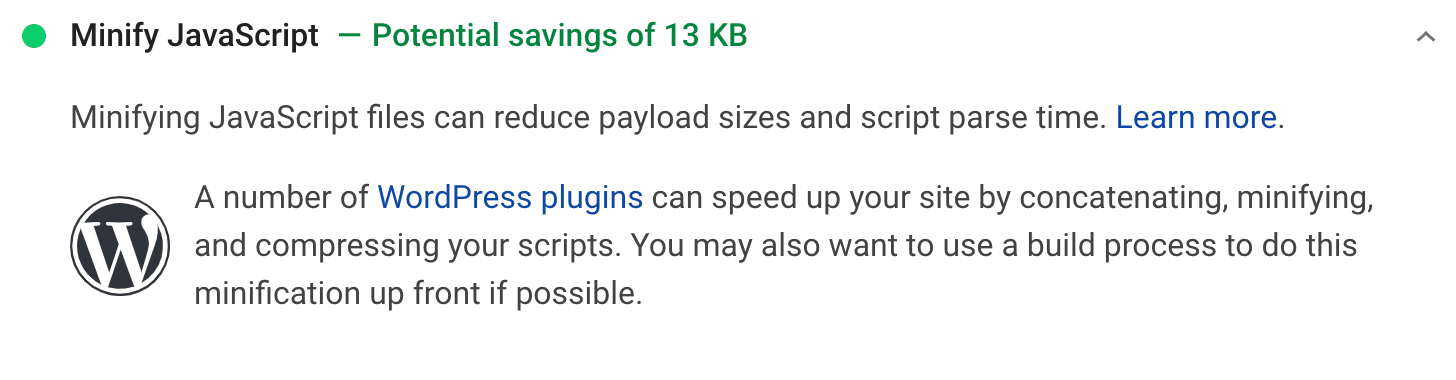
Minimize JavaScript suggestions
Automatic maximization or WP Rocket can also handle this task for your WordPress site.
6. Delete unused CSS
Any code in your style sheet that is content must be loaded in order for your page to be visible to users. If having CSS on your site is not really helpful, then it will reduce your performance.
That is why Google recommends Delete any unused CSS :
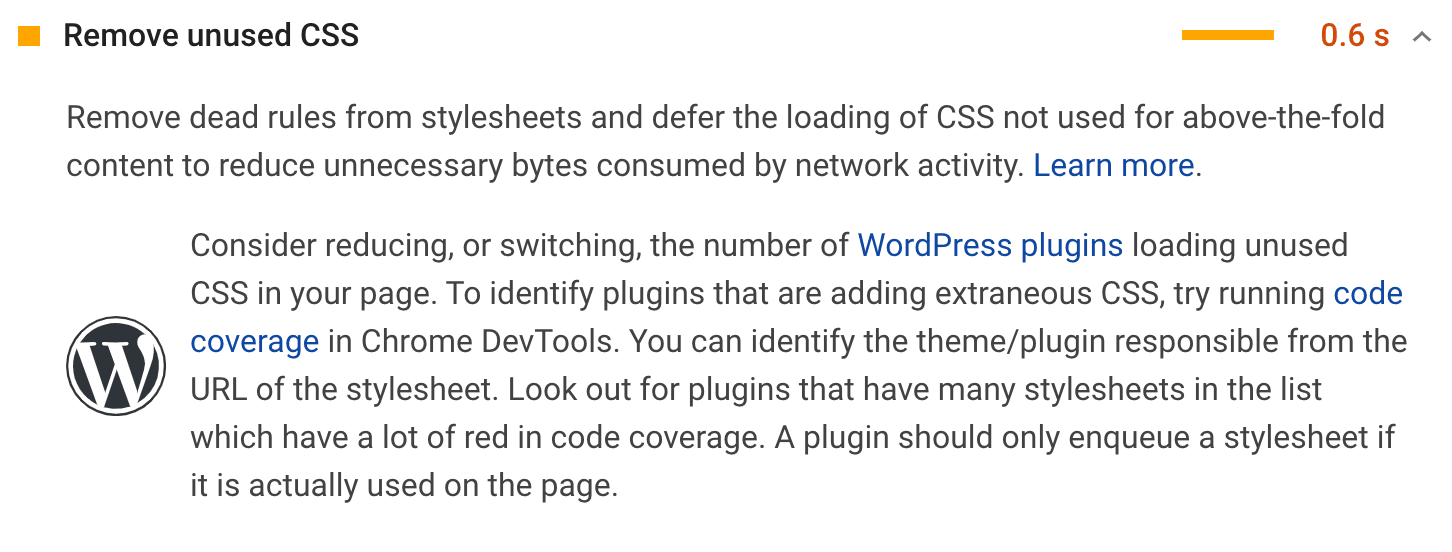
Delete unused CSS suggestions
The solution here is basically the same as the one that removed the blocking CSS. You can style inlining or delay in any way that makes the most sense for your pages. You can also use a tool like Chrome DevTools to Find unused CSS need to be optimized.
7. Minimize main subject work
The 'main topic' is the main component of the user's browser responsible for turning the code into a web page that visitors can interact with. It parses and executes HTML, CSS and JavaScript. In addition, it is responsible for handling user interactions.
This means that, when the main stream works through your website code, it also cannot process user requests. If your site's main theme work takes too much time, this can result in poor UX and slow page load time.
Google PageSpeed will flag pages that take more than four seconds to complete the main topic work and present a usable site:

Minimize main job proposals
Some of the methods used to reduce the main subject work that have been covered in other parts of this post include:
- Minimize your code
- Delete unused code
- Implement caching
However, you may also want to consider splitting the code. This process involves splitting your JavaScript into executable packages as needed, rather than having the browser load them all before the page becomes interactive.
Webpack often used to perform code decomposition. Note that this is a fairly advanced technique and beginners should usually do it alone.
8. Reduce JavaScript execution time
JavaScript execution is often the most prominent contribution to the main subject work. PageSpeed Insights has a separate recommendation to alert you if this action significantly affects your site's performance:

Reduce JavaScript execution time recommendations
The methods proposed above to reduce the workflow of the main thread will also address this warning in your PageSpeed results.
9. Reduced server response time (TTFB)
Time to First Byte (TTFB) is a measure of the time it takes a browser to receive the first data byte from your site's server upon request. While this is not the same as your overall site speed, having a low TTFB is good for your site's performance.
Therefore, reducing server response time is one of Google PageSpeed Insights recommendations. If you are able to achieve a low TTFB, you will see this message in the past Audited section:
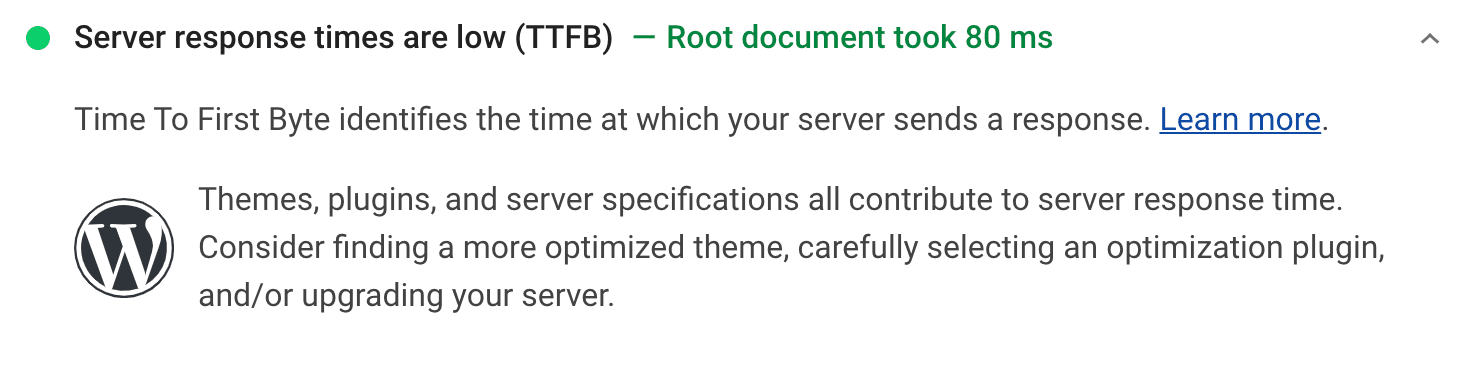
Server response time is low notification
There are several factors that can affect your TTFB. Some strategies to lower it include:
- Select one Quality web hosting provider high
- Use lightweight themes and plugins
- Reduce the number of plugins installed on your site
- Using the Content Delivery Network (CDN)
- Deploy browser cache
- Choose a solid Domain Name System (DNS) provider
10. Image size suitable
Media files like images can be a real drag on your site's performance. Proper sizing is a simple way to reduce your load time:

Suggest suitable image size
If your page includes images larger than necessary, the CSS is used to resize them appropriately. This takes more time than simply loading the image at the original appropriate size, thus affecting your page performance.
To fix this, you can either upload the image at the appropriate size or use ‘feedback image’. This involves creating images of different sizes for different devices.
The srcset attribute identifies different available files, and the attribute size tells the browser which one should be used based on the current screen size.
11. Defer Offscreen images
The process of delaying an off-screen image is often referred to as ‘lazy loading’. This means that instead of having the browser load every image on a page before displaying content on the first screen, it will only load the images displayed immediately.
Less loading before the page is displayed means better performance, which is why Google recommends this method:
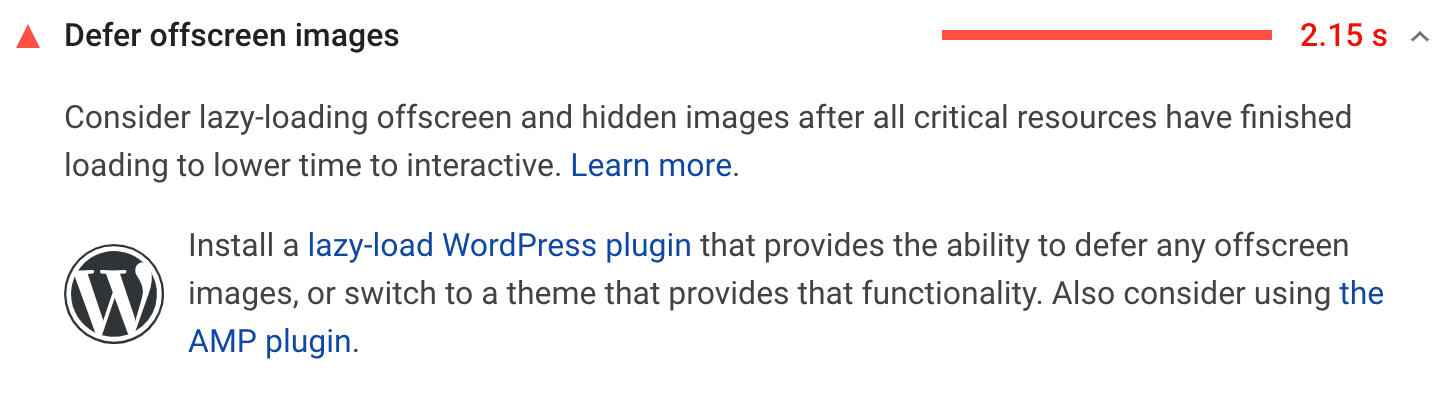
Defer off-screen image suggestions
There are several WordPress plugins created specifically for lazy loading, including Native Lazy Load and Lazy Load of WP Rocket . Various performance and image optimization plugins like Auto Maximize also have lazy loading features.
12. Effective image encoding
This is also the main method to follow Google's recommendations for effective image coding:

Effective image coding coding
It is important to achieve the smallest file size possible, without any loss of image quality. Plugins like Imagify and Smush Can help with this task. You can learn more about them in tutorial ours to optimize the image .
Other suggestions that affect whether you 'pass' or 'fail' an effective coded image audit include:
- Serve images at the correct size
- Perform lazy loading (delay images off screen)
- Convert images to next generation file formats, such as WebP
- Use video formats for animated content, such as GIFs
In addition to compressing your images, you can follow the steps to implement these recommendations as described elsewhere in this post.
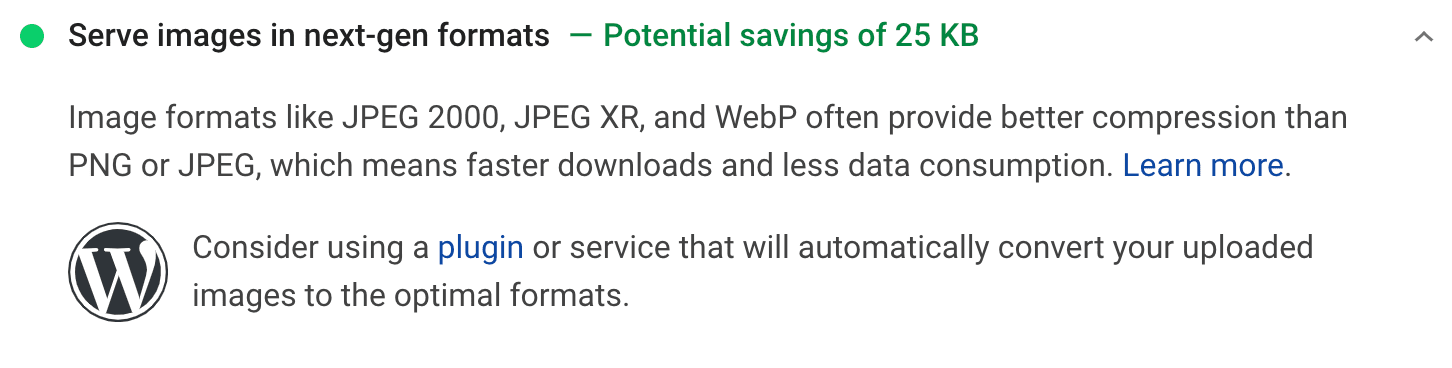
13. Serve images in next generation formats
There are some image file formats that load faster than others. Unfortunately, they are not your usual PNG or JPEG format. WebP image is becoming a new standard and Google PageSpeed will notify you if your images do not comply with it:
Serve images in next generation format recommendations
This may seem like a difficult proposition, as you may already have many images on your WordPress site. Fortunately, there are plugins that can help. For example, Imagify and Smush both offer WebP conversion.
14. Use video format for animated content
GIFs can be an effective form of visual content in many situations. Tutorial guides, feature reviews and even funny animations can all enhance your posts and make them more interesting and valuable to your readers.
Unfortunately, those benefits pay for your performance. GIFs are requesting a download, which is why PageSpeed Insights recommends serving video content instead:

Use video format for suggesting animated content
Unfortunately, converting GIFs into video formats is not the easiest process. First, you will have to decide what kind of video you want to use:
- MP4: Creates slightly larger files, but is compatible with most major browsers.
- WebM: The most optimized video format, although it has limited browser compatibility.
Once you have made the most appropriate choice for your website, you will need to convert the file formats. The best way to do this is via the command line. To get started, install FFmpeg . This is an open source tool for converting file formats:

FFmpeg file format converter for video and audio
Then open your command line interface and run the following command:
ffmpeg -i input.gif output.mp4
This will convert the GIF with the input.gif file name to an MP4 video with the output.mp4 file name. Changing the format is only the beginning, however. Now you need to embed the resulting video in your WordPress site in a way that makes it appear like an animated GIF.
Embed video content for animation
As you may have noticed if you've ever watched GIFs before, they're a little different than regular videos. They usually automatically play and run on a loop, and they always have no sound. Embedding your new MP4 or WebM file on your WordPress site will not create these features.
However, you can recreate them with some very simple code. Upload your video to your media library, then add the following to the page or post where you want your GIF to be included:
This will apply the properties specified to your video, making it appear more ‘like GIF’. Just adjust the file name and type to match your resource. For more details on this topic, we recommend that you read Google's instructions about Convert GIF into video .
15. Make sure the text is still visible while loading Webfont
Like images, fonts tend to be large files that take a long time to load. In some cases, the browser may hide your text until the font you are using completely loads, which will result in this suggestion from Google PageSpeed Insights:

Make sure the text is still visible while proposing to download webfont
Google recommends you should solve this problem by applying the API swap directive to display the font style of your @ font face. To do this, access your style sheet (style.css) and add the following to the src attribute under @ font-face:
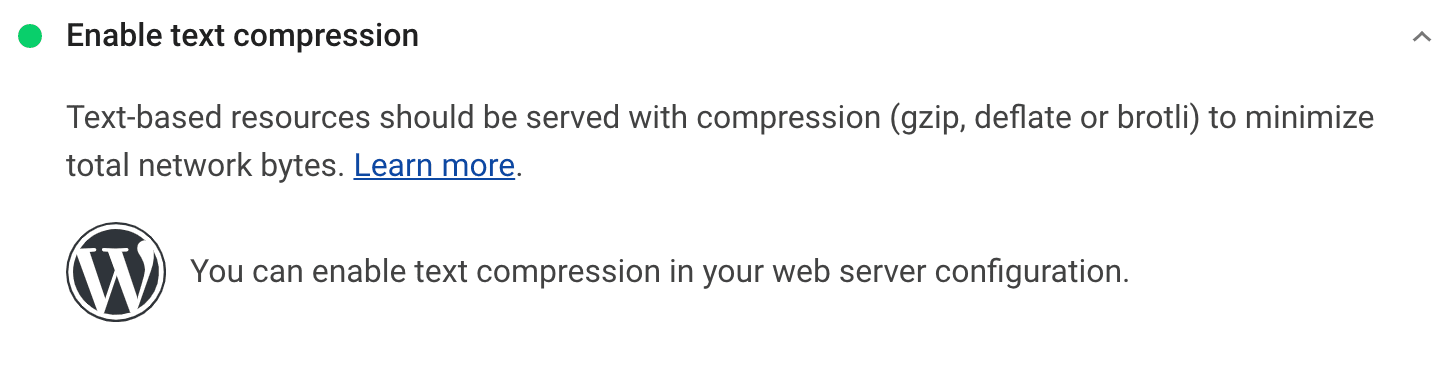
16. Enable text compression
Google PageSpeed Insights ‘Activate text compression suggestions that mention the use of GZIP compression:
Allow text compression suggestions
Trong một số trường hợp (như bạn có thể thấy trong hình trên), nén văn bản sẽ được bật tự động trên máy chủ của bạn. Nếu đây không phải là trường hợp cho trang web của bạn, bạn có một vài lựa chọn để làm theo khuyến nghị này.
Đầu tiên là cài đặt một plugin có tính năng nén GZIP. WP Rocket là một giải pháp khả thi nếu bạn sẵn sàng trả tiền cho nó.
Bạn cũng có thể nén văn bản của bạn bằng tay. Điều này liên quan đến việc chỉnh sửa tệp .htaccess của bạn , có thể có rủi ro, vì vậy hãy đảm bảo bạn có bản sao lưu gần đây.
Hầu hết các trang web WordPress chạy trên máy chủ Apache. Mã cho phép nén GZIP trông như thế này:
17. Kết nối với nguồn gốc cần thiết
Rất có thể bạn có thể có ít nhất một tài nguyên của bên thứ ba trên trang web của mình – Google Analytics là một ví dụ phổ biến. Có thể mất thời gian để trình duyệt thiết lập kết nối với các tài nguyên này, làm chậm tốc độ tải của bạn.
Sử dụng các thuộc tính kết nối trước có thể cho các trình duyệt biết ngay rằng có các tập lệnh của bên thứ ba trên trang của bạn cần được tải. Quá trình yêu cầu họ sau đó có thể bắt đầu càng sớm càng tốt, cải thiện hiệu suất của bạn.
Nếu Google cảm thấy rằng trang của bạn có thể được hưởng lợi từ kỹ thuật này, bạn sẽ thấy đề xuất Kết nối trước với nguồn gốc được yêu cầu :

Kết nối với đề xuất nguồn gốc cần thiết
Có một vài cách để thực hiện chiến lược tối ưu hóa này. Nếu bạn cảm thấy thoải mái với việc chỉnh sửa các tệp chủ đề WordPress của mình, bạn có thể thêm thẻ liên kết vào tệp header.php của mình . Đây là một ví dụ:
Trong trường hợp này, thẻ thông báo cho các trình duyệt rằng họ cần thiết lập kết nối đến example.com càng nhanh càng tốt. Google PageSpeed Insights sẽ liệt kê mọi tài nguyên có liên quan mà bạn nên thêm các thẻ liên kết với các thuộc tính kết nối trước.
Tùy chọn khác là sử dụng một plugin để đạt được hiệu quả tương tự. Perfmatters là một trong những Plugin tôi phục nhất về khả năng tối ưu hóa WordPress
18. Yêu cầu tải trước
Tương tự như Đề xuất kết nối với nguồn gốc được yêu cầu , theo đề xuất này cho phép bạn giảm thiểu số lượng yêu cầu mà trình duyệt phải thực hiện đối với máy chủ của trang web của bạn. Tuy nhiên, thay vì kết nối với tài nguyên của bên thứ ba, các yêu cầu chính của Tải trước liên quan đến việc tải các tài sản quan trọng trên máy chủ của riêng bạn:

Tải trước yêu cầu chính yêu cầu
Việc thực hiện kỹ thuật này cũng rất giống với khuyến nghị trước đó. Bạn có thể thêm các thẻ liên kết chỉ định các tài nguyên được liệt kê trong PageSpeed Insights vào tệp header.php của bạn :
Bạn cũng có thể kết hợp thẻ này bằng cách sử dụng Perfmatters, WP Rocket hoặc Pre * Party Resource gợi ý.
19. Tránh chuyển hướng nhiều trang
Chuyển hướng được sử dụng khi bạn muốn một URL trỏ đến một URL khác. Chúng thường được sử dụng khi bạn di chuyển hoặc xóa một trang trên trang web của bạn. Mặc dù không có gì sai khi sử dụng chuyển hướng nói chung, nhưng chúng gây ra sự chậm trễ thêm trong thời gian tải.
Nếu bạn có quá nhiều chuyển hướng trên trang web của mình, bạn có thể thấy đề xuất này trong Google PageSpeed Insights:

Tránh đề xuất chuyển hướng nhiều trang
Điều duy nhất bạn có thể làm để đáp lại đề xuất này là đảm bảo bạn chỉ sử dụng chuyển hướng khi bạn thực sự phải làm.
20. Phục vụ tài sản tĩnh với chính sách bộ nhớ cache hiệu quả
Nếu bạn đã sử dụng Google PageSpeed Insights một thời gian, bạn có thể biết rõ hơn về đề xuất này như cảnh báo bộ nhớ đệm của trình duyệt . Trong phiên bản 5, giờ đây nó được gắn nhãn là Phục vụ tài sản tĩnh với chính sách bộ nhớ cache hiệu quả :

Máy chủ tài sản tĩnh với đề xuất chính sách bộ đệm hiệu quả
Đề xuất này có một vài lớp chúng ta cần phải đi qua. Đầu tiên là “bộ nhớ đệm” nghĩa là gì. Nói tóm lại, đó là một quá trình trong đó trình duyệt lưu các bản sao của trang của bạn, để chúng có thể được tải nhanh hơn trong các lần truy cập trong tương lai.
Cách phổ biến nhất mà các trang web WordPress triển khai bộ nhớ đệm là với các plugin . WP Rocket và W3 Total Cache là các tùy chọn phổ biến.
Khi bạn đã bật bộ đệm cho trang web của mình, bạn có thể lo lắng về phần thứ hai của đề xuất này, đó là “hiệu quả” của chính sách bộ đệm của bạn. Trình duyệt xóa bộ nhớ cache định kỳ để làm mới chúng với các bản sao được cập nhật.
Lý tưởng nhất, bạn muốn khoảng thời gian này cao hơn thay vì thấp hơn. Nếu bạn xóa trang web của mình khỏi bộ nhớ cache trong vài giờ, điều đó sẽ đánh bại mục đích sử dụng kỹ thuật này ngay từ đầu. Bạn có thể tối ưu hóa thời gian bộ nhớ cache hết hạn sử dụng Cache-Control và Expires tiêu đề.
Thêm tiêu đề kiểm soát bộ đệm
Sử dụng mã sau đây để thêm các tiêu đề Kiểm soát bộ đệm trong Nginx:
location ~* .(js|css|png|jpg|jpeg|gif|svg|ico)$ {
expires 30d;
add_header Cache-Control “public, no-transform”;
}
Bạn nên thêm nó vào tập tin cấu hình máy chủ của bạn. Trong ví dụ trên, các loại tệp được chỉ định sẽ hết hạn sau 30 ngày.
Thay vào đó, những người có máy chủ Apache nên sử dụng đoạn mã này trong các tệp .htaccess của họ :
Header set Cache-Control “max-age=84600, public”
Thêm mã này trước #BEGIN WordPress hoặc sau #END WordPress . Trong ví dụ này, thời gian hết hạn bộ nhớ cache được đặt thành 84.600 giây.
Thêm tiêu đề hết hạn
Các tiêu đề Cache-Control hiện nay là khá nhiều tiêu chuẩn. Tuy nhiên, có một số công cụ (bao gồm GTMetrix) vẫn kiểm tra các tiêu đề Hết hạn .
Bạn có thể thêm chúng vào máy chủ Nginx bằng cách kết hợp các mục sau vào khối máy chủ của bạn:
location ~* .(jpg|jpeg|gif|png|svg)$ {
expires 365d;
}
location ~* .(pdf|css|html|js|swf)$ {
expires 2d;
}
Bạn nên đặt thời gian hết hạn khác nhau dựa trên các loại tệp. Các máy chủ Apache sẽ tạo ra kết quả tương tự nếu bạn thêm mã này vào tệp .htaccess của mình :
## EXPIRES HEADER CACHING ##
ExpiresActive On
ExpiresByType image/jpg “access 1 year”
ExpiresByType image/jpeg “access 1 year”
ExpiresByType image/gif “access 1 year”
ExpiresByType image/png “access 1 year”
ExpiresByType image/svg “access 1 year”
ExpiresByType text/css “access 1 month”
ExpiresByType application/pdf “access 1 month”
ExpiresByType application/javascript “access 1 month”
ExpiresByType application/x-javascript “access 1 month”
ExpiresByType application/x-shockwave-flash “access 1 month”
ExpiresByType image/x-icon “access 1 year”
ExpiresDefault “access 2 days”
## EXPIRES HEADER CACHING ##
Một lần nữa, bạn nên thêm mã này trước #BEGIN WordPress hoặc sau #END WordPress .
Bộ nhớ đệm hiệu quả của Google Analytics
Trớ trêu thay, tập lệnh Google Analytics mà bạn có thể đã thêm vào tiêu đề trang của mình để theo dõi hành vi của người dùng có thời gian hết hạn bộ nhớ cache chỉ hai giờ. Điều này có khả năng vì vậy, nếu các bản cập nhật được thực hiện cho nền tảng, người dùng sẽ có quyền truy cập vào các thay đổi một cách nhanh chóng.
Tập lệnh này sẽ xuất hiện trong danh sách các tài nguyên yêu cầu sự chú ý của bạn trong Phục vụ tài sản tĩnh với đề xuất chính sách bộ đệm hiệu quả . Vì nó thuộc về bên thứ ba, bạn không thể thay đổi thời gian hết hạn với các tiêu đề Kiểm soát bộ đệm hoặc hết hạn .
Nếu đây là tập lệnh duy nhất được liệt kê theo khuyến nghị này, bạn vẫn có thể vượt qua kiểm toán:
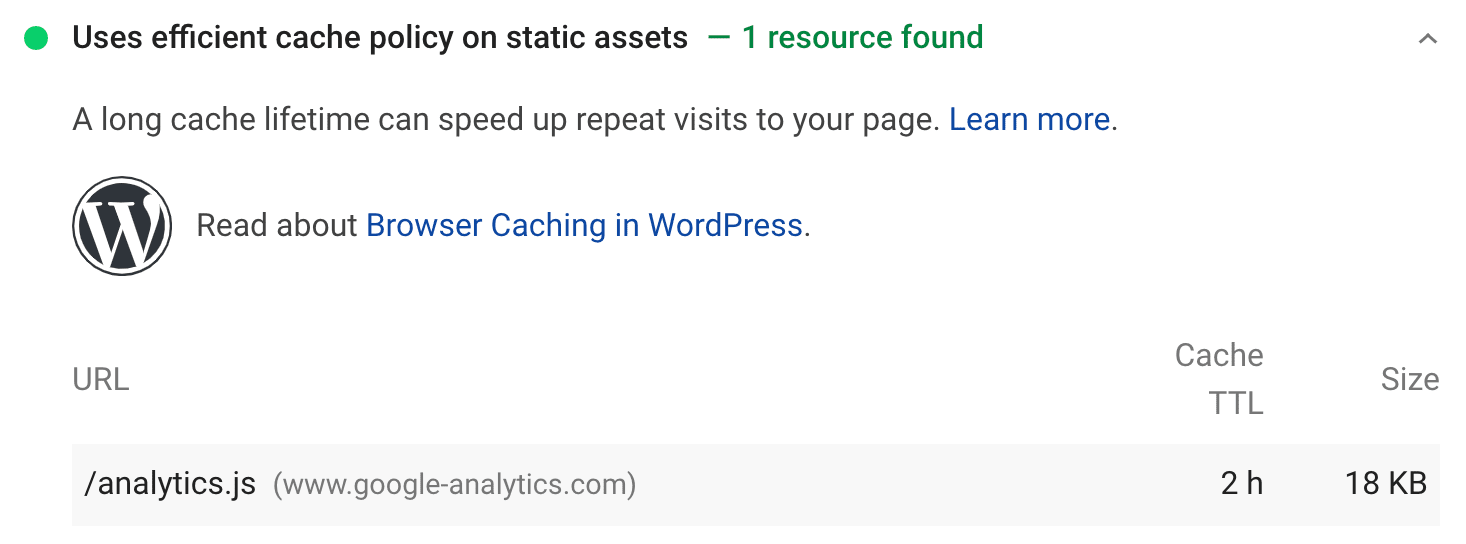
Đã qua kiểm toán chính sách bộ nhớ cache hiệu quả
Tuy nhiên, như chúng tôi đã lưu ý trong suốt bài đăng này, điểm số PageSpeed của bạn ít quan trọng hơn hiệu suất thực tế và cảm nhận của bạn. Để phục vụ tài nguyên này một cách hiệu quả, bạn có thể xem xét việc lưu trữ Google Analytics tại địa phương.
Các plugin như Bộ tối ưu hóa phân tích hoàn chỉnh (CAOS) và Perfmatters sẽ cho phép bạn thực hiện việc này.
21. Giảm tác động của mã bên thứ ba
Bây giờ chúng tôi đã đề cập đến một vài cách khác nhau trong đó các tập lệnh của bên thứ ba có thể ảnh hưởng tiêu cực đến hiệu suất của bạn và dẫn đến việc kiểm tra không thành công từ Thông tin chi tiết của PageSpeed. Lý tưởng nhất, tốt nhất là hạn chế sự phụ thuộc của bạn vào các công cụ này để ngăn chặn các tác động bất lợi.
Tuy nhiên, trong một số trường hợp, giải pháp tốt nhất cho nhu cầu trang web của bạn là kết hợp tập lệnh của bên thứ ba. Google Analytics là một ví dụ tuyệt vời. Những người khác bao gồm:
Trong trường hợp bạn thấy việc sử dụng tập lệnh của bên thứ ba là cần thiết, điều quan trọng là vẫn phải giảm tác động của nó đến hiệu suất trang web của bạn, vì kết quả phân tích PageSpeed của bạn sẽ cho bạn biết:

Giảm tác động của khuyến nghị mã bên thứ ba
Để tải mã của bên thứ ba hiệu quả hơn, bạn có thể xem xét một trong những kỹ thuật chúng tôi đã đề cập trong bài đăng này:
- Trì hoãn việc tải JavaScript
- Sử dụng thẻ liên kết với các thuộc tính kết nối
- Tự lưu trữ tập lệnh của bên thứ ba (như chúng tôi đã mô tả với Google Analytics ở trên)
Các phương pháp này sẽ giảm thiểu tác động đến hiệu suất trang web của bạn.
22. Tránh tải trọng mạng rất lớn
Đề xuất này đặc biệt có liên quan đến khách truy cập di động của bạn. Tải trọng lớn có thể yêu cầu sử dụng nhiều dữ liệu di động hơn, do đó làm mất tiền của người dùng. Giảm thiểu số lượng yêu cầu mạng cần thiết để truy cập các trang của bạn có thể ngăn chặn điều này:

Tránh đề xuất tải trọng mạng lớn
Google khuyên bạn nên giữ tổng kích thước byte của mình ở mức 1.600 KB trở xuống. Các phương pháp được sử dụng phổ biến nhất để đạt được mục tiêu này được tìm thấy trong suốt bài đăng này, bao gồm:
- Trì hoãn CSS, JavaScript và hình ảnh dưới màn hình đầu tiên
- Giảm thiểu mã
- Nén tập tin hình ảnh
- Sử dụng định dạng WebP cho hình ảnh
- Triển khai bộ nhớ đệm
Thực hiện theo các bước có liên quan cho các chiến lược này và bạn nên vượt qua cuộc kiểm toán này mà không cần bất kỳ nỗ lực bổ sung nào.
23. Dấu thời gian và biện pháp của người dùng
Đề xuất này chỉ có liên quan nếu bạn đang sử dụng API thời gian của người dùng . Công cụ này tạo dấu thời gian để giúp bạn đánh giá hiệu suất JavaScript của mình. Nếu bạn đã thiết lập API cho trang web của mình, bạn sẽ thấy các nhãn hiệu và biện pháp của mình trong tiêu đề này trong PageSpeed Insights:
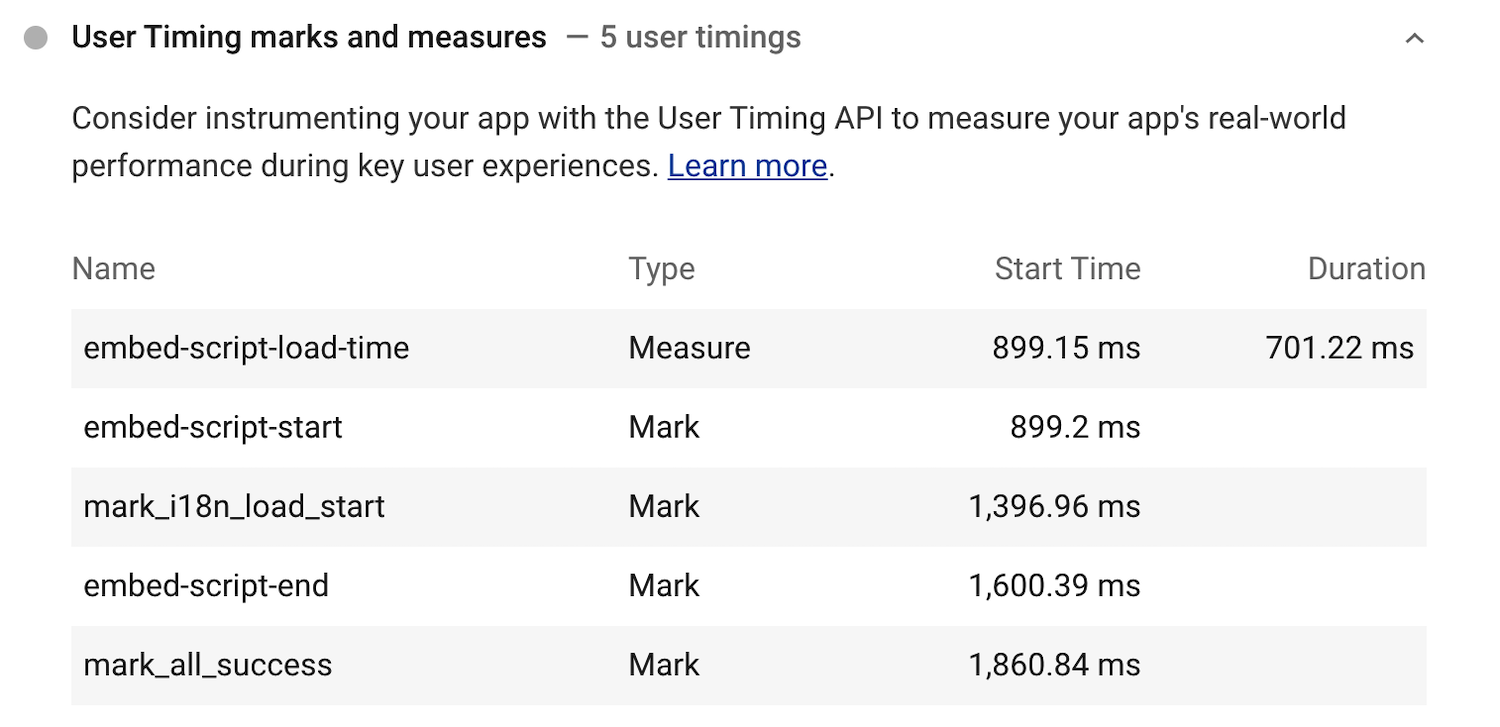
Dấu thời gian của người dùng và các biện pháp khuyến nghị
Như bạn có thể thấy, đây là một đề xuất khác của Google mà không dẫn đến ‘vượt qua’ hoặc ‘thất bại’. PageSpeed Insights chỉ đơn giản là làm cho thông tin này có thể truy xuất dễ dàng, vì vậy bạn có thể sử dụng nó để đánh giá các khu vực có thể yêu cầu tối ưu hóa.
Nếu bạn quan tâm đến việc kết hợp API thời gian người dùng vào trang web WordPress của mình, bạn có thể tìm hiểu thêm trong hướng dẫn Mozilla về chủ đề này .
24. Tránh Kích thước Mô hình Đối tượng Tài liệu Quá mức (DOM)
Nói một cách đơn giản nhất, DOM là cách các trình duyệt biến HTML thành các đối tượng. Nó liên quan đến việc sử dụng cấu trúc cây được tạo thành từ các nút riêng lẻ mà mỗi nút đại diện cho một đối tượng. Đương nhiên, DOM trang của bạn càng lớn thì thời gian tải sẽ càng lâu.
Nếu trang của bạn vượt quá các tiêu chuẩn nhất định về kích thước DOM , nó sẽ khuyên bạn nên giảm số lượng nút cũng như mức độ phức tạp của kiểu CSS của bạn :

Tránh đề xuất kích thước DOM quá mức
Thủ phạm phổ biến nếu bạn ‘thất bại’ cuộc kiểm toán này trong PageSpeed Insights là chủ đề WordPress của bạn. Các chủ đề nặng thường thêm khối lượng lớn các yếu tố vào DOM và cũng có thể bao gồm kiểu dáng phức tạp làm chậm trang web của bạn. Nếu đây là trường hợp, bạn có thể cần phải đổi Theme cho WordPress .
Tóm lược
Google PageSpeed Insights phải là một yếu tố chính trong hộp công cụ quản trị trang web của bạn. Tuy nhiên, việc khắc phục điểm số của bạn và ám ảnh về việc đạt 100/100 đáng thèm muốn có lẽ không phải là cách sử dụng tốt nhất thời gian của bạn. Nó có thể đưa bạn ra khỏi các nhiệm vụ quan trọng khác có thể cung cấp lợi ích quan trọng hơn.
Trong bài đăng này, chúng tôi đã đề cập đến những cách mà Google PageSpeed Score thực hiện và không quan trọng. Chúng tôi cũng đã chia sẻ một số hướng dẫn ngắn gọn để đưa các đề xuất của nền tảng hoạt động trên trang web WordPress của bạn, để cải thiện hiệu suất của nó.
Bạn có thắc mắc về Google PageSpeed Insights hoặc tối ưu hóa hiệu suất trang web của bạn không?

CEO - Founder of Compa Marketing. Specialist with over 5 years of experience in the field of Digital Marketing, SEO / SEM in Vietnam and the world.

0 Comments