Note: Please read the article carefully before proceeding! If in the process of using you encounter any errors, such as broken download links, slow loading blog, or unable to access a certain page on the blog ... then please inform me through the Contact page. Thanks!
USB, Pendrive or FlashDrive is an extremely popular portable data storage device and it is really useful for computer users.
Although small by the thumb only, but the effect it brings is not small at all, USB helps you store data, from a few dozen to a few hundred GB of data, in addition, you can use it USB to create Windows installation USB, or create a USB rescue tool computer to repair Windows when errors ....
In general, there are many interesting and useful things around the USB that you own. Besides, you can plug, unplug and use USB on any device with USB port, because it is a mobile device (Portable), plug-and-play (PnP).
But also because of this, many people have the habit of unplugging USB when done without using the feature Safe withdrawal (Safely Remove) of Windows. For a simple reason, it's LAO.
Read more:
But unplugging the USB without using Safely Remove mode will really be a risk, guys, your data will be corrupted or lost at any time. Even darker, the USB might be damaged ...
Therefore, in this article I will guide you how to set up shortcut to safely remove the USB with just one key press on Windows operating system!

#first. About how to install keyboard shortcuts to safely remove USB on Windows
Previously, to protect all data on your USB from before, before removing the USB from the computer, you would have to perform steps Safely Remove to disconnect the USB data with Windows, before actually physically disconnecting by unplugging it from the USB port of the computer.
You can read more of this article to learn more about how to safely remove USB offline! If presented here, the article will be a bit long.
This applies not only to Windows, but also to macOS and Linux. But most users, including myself: P, will often skip the safe USB removal step from the computer, especially when it comes to urgent work, because using Safely Remove is quite time-consuming.
And in fact, I have not lost the data due to unplugging USB, perhaps this is also the reason that I am lazy and not yet afraid of you guys 🙂 Just try to take a look 😛
But since Windows 10 Version 1809 and later, Microsoft has completely changed the process of safely removing USB on Windows computers, by integrating and turning on the default feature of default is Quick Removal: Allows you to disconnect USB suddenly without taking steps Safely Remove again.
However, if you use Quick Removal then you will not be able to use it Write-Caching Policy to increase read and write speed, and access data on USB again. Details of this issue, the blog already has an article, you can review it here dentist!
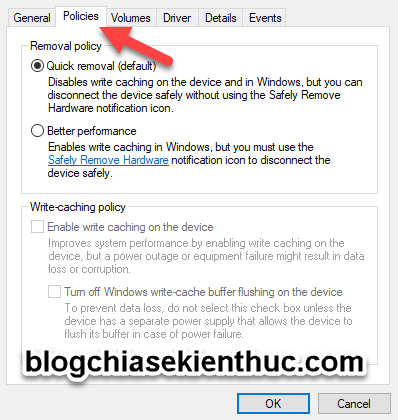
However, if you just want to remove the USB quickly but still want to use Safely Remove and Write-Caching Policy There is still a way for you. Yes, the USB Disk Injector software will help you do that.
This is a free software to assist you in managing mobile storage devices such as SD cards, USB, MicroSD, ... on the computer.
And because USB Disk Injector supports creating shortcuts, we can take advantage of it to quickly and safely remove USB with just one key on the keyboard.
How to do it, please invite you to continue reading the article!
#2. Instructions for installing and using the USB Disk Injector software
Note: In this article I performed on Windows 10, Windows 7, 8 or 8.1 operating system, you should do the same.
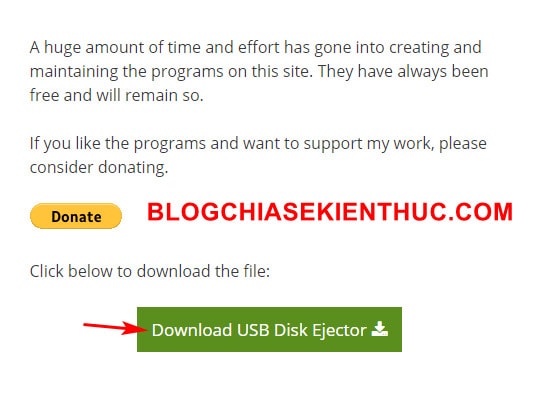
+ Step 1: Download the USB Disk Inject software to the computer.
USB Disk Inject is a 100% Free software, so you can go to the homepage of this software here => Scroll down to select the button Dowload it here => then click the button Download USB Disk Injector To download its latest version, the version at the time of writing is 1.3.0.6.
Update add 1 Backup link for sure 😛
Note: This is a portable software (Portable) so you will not need to install, just run the file
*.exeis always used, so you need to extract it to a certain folder for convenient use after the download is complete.
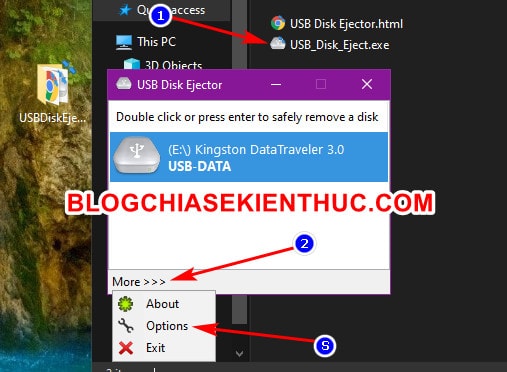
+ Step 2: You run the file USB_Disk_Inject.exe to start the software, you will have a very minimal interface with most of the area used to display the USB devices, SD Cards, MicrosDs being connected.
You can double-click on the name of a device on this list to Safely Remove - safely remove USB from Windows 10.
When not in use, you press the key ESC on the keyboard, or zoom out to hide it under the Taskbar, this time it will continue running in the background. Rest assured that this application is extremely lightweight, so it will not affect the performance of your computer.
Perform: But what we need in this article is Create a key press Safely Remove to unplug USB quickly => so click on it More>> then select Options to enter the settings of Disk Injector.
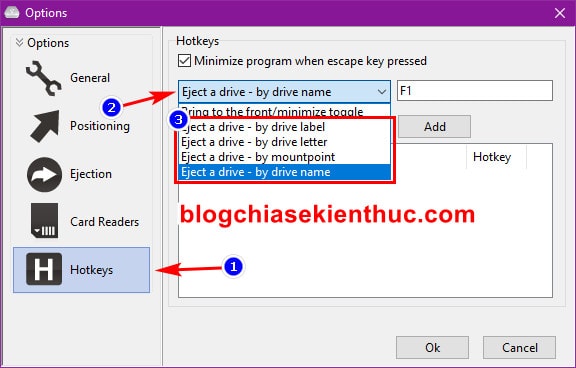
+ Step 3: In the window Options just appeared, you switch to tab Hotkeys to proceed to set up keyboard shortcuts.
First, click menu Bring to the front/minimize toggle To choose one of the ways that the software will use to identify your USB, we have the following options:
- Eject a drive - by drive label : Unplug the USB in safe mode using the USB label or name. This is a name like USB-Data, USB-Data that we usually put that => Only use in case your USB does not have more than 1 partition.
- Eject a drive - by drive letter : Safely Remove USB using wildcards - the same characters as C :, D :, E:, etc ... that you => Do not use because the wildcard of USB is often changed when used on another Windows computer, or after connections ...
- Eject a drive - by mount point : Safely Remove USB usage
Mount Point(E: , C: , F: , ...) => Not recommended because it is the same asDrive Letteron. - Eject a drive - by drive name : Safely Remove USB using the device name (Example: Kingston Data Traveler 3.0, Sandisk Extreme PRO, ...) => Recomend using Because the device name is set by the manufacturer, it cannot be replaced on all operating systems.
=> Now you all know which option to use, right? I still have a choice Eject a drive - by drive name stop it
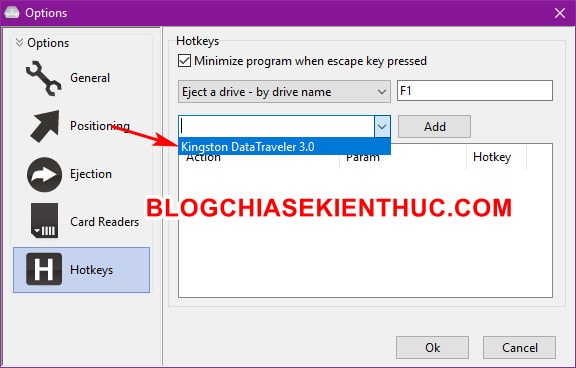
+ Step 4: Next, click on the drop-down arrow in the box below => and select the correct USB, SD Card, MicrosD ... name that is plugged into the device, here I am using a USB 16 Kingston Data Traveler G3 3.0 Please.
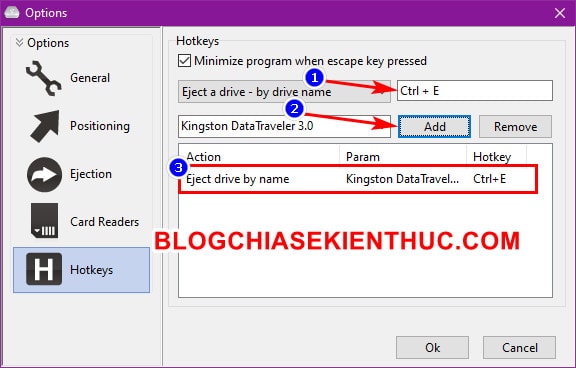
+ Step 5: Finally, you click on the box F1 (first) => then press 1 key combination on the keyboard you want to assign to be a shortcut to safely withdraw USB => and press the button Add to add, that's it.
Note: It is recommended to put a little bit of shortcuts to not coincide with the shortcut on Windows, or the shortcut in Word ……
=> Once created, this shortcut combination will appear in the list below, you can create unlimited shortcuts for the same or multiple functions but if you choose the wrong key, you must Remove It goes => and recreates from scratch according to the breeze.
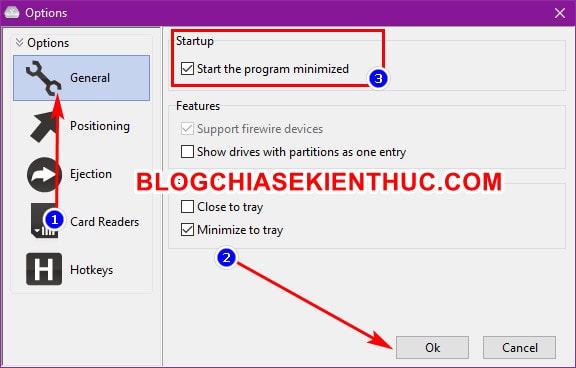
+ Step 6: Next, go back to the tab General => and tick the line Start the program minimized => press OK Let the software start automatically when you turn it on and always run in the background so you can use the combination of keys installed above at any time.
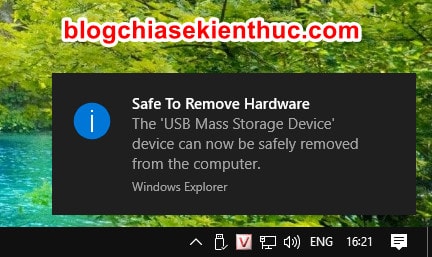
So from now on, when you want to safely remove the USB in the right process on Windows, you only need to press the correct key combination previously set => and when a message appears, remove the USB only.
# 3. Epilogue
So I have just detailed instructions for you how Shortcut setting for safe USB withdrawal on Windows using the USB Disk Injector software already.
It's quite a useful software, isn't it, and when you don't want to use it anymore, simply delete the folder of the software you unzipped. Hope this article will be helpful for you. Good luck !
CTV: Nguyen Thanh Tung - Blogchiasekienthuc.com
Note: Was this article helpful to you? Do not forget to rate the article, like and share it with your friends and relatives!

0 Comments