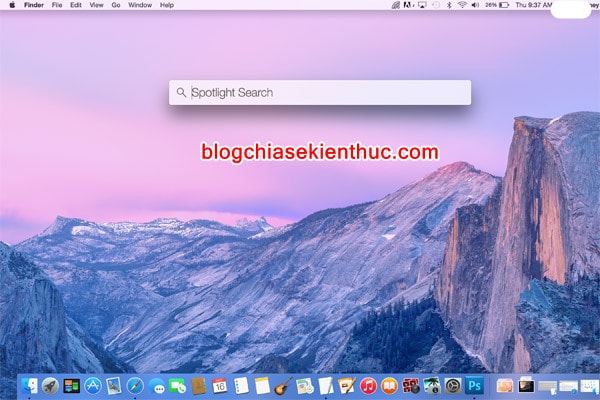
Anyone who has used macOs will know that macOs has a search feature called Spotlight Search (calling out with keyboard shortcuts Command + Space) is quite powerful.
You can search for anything on your macOs system by typing keywords into it, such as images, documents, videos, system settings, etc.
Windows 10 also has a similar Search box with these features, but if you prefer a minimalist search bar, I think the macOs search bar is more suitable for you.
Read more:
Of course, in this article, I will not guide you to install macOs (Hackintosh) on your PC or Laptop 😛, I just recommend you an application with such functionality.
Install mac OS's Spotlight Search on Windows 10
Search section on Windows 10 when you open it will show the list, such as the keyword input box (for sure), the top frequently used applications, and finally the file history (file history instead Not search history, guys.)
As for macOs, it does not show anything, when you call it up, it only shows the search box, after you enter the keyword, it will show the search results.
Information to you two years ago, Microsoft has tried to bring Search feature like macOs to Windows 10, but it is still only in the Windows Insider Preview version only.
Okay, back to our main problem, the app that makes it possible to get a search bar like macOs on Windows 10 is Jarvis, Not J.A.R.V.I.S It's Tony Stark's :))
Start:
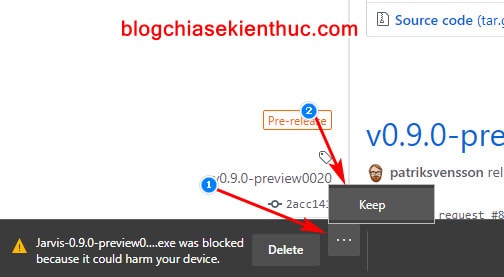
+ Step 1: You download the software Jarvis with one of the links below!
Download link: Mega Link / Mediafile link
Note: Download the software that says it has a dangerous software, do not worry, this is only an error due to a false identification. You choose the option and keep it to use offline!
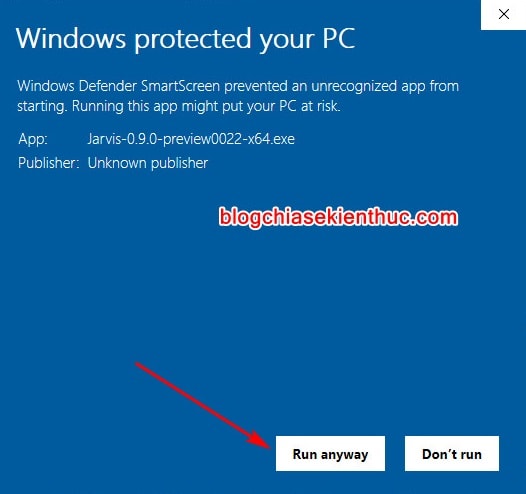
+ Step 2: Then, when you open the app, you receive an unsafe warning again Windows Defender Startscreen, ignore it => and select Run anyway to run the installation file.
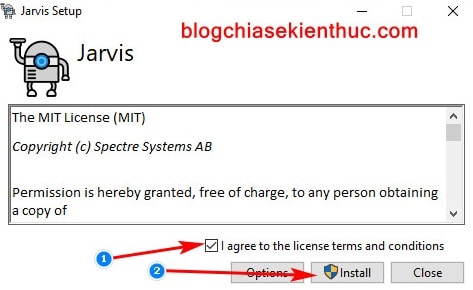
+ Step 3: You can scroll down to read through the terms of use of Jarvis => and then tick I agree to the license terms and coditions To accept the terms of use => and press Install to start the installation process.
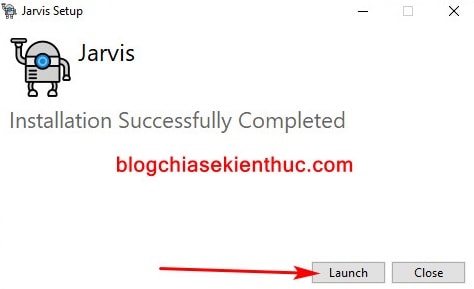
+ Step 4: Wait for a while for the software to install and finally click the button Launch to run Jarvis, rather open Jarvis's settings.
Inside:
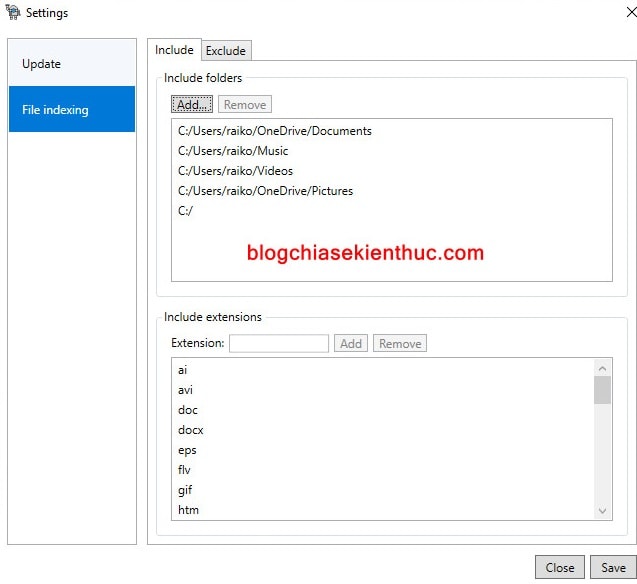
- Part Update is the setting for software updates, nothing special so I skip it.
- Section left File Indexing New key, in the tab Include is the tab for you to set the folders that Jarvis is searched in (Include Folders), and the file formats to be searched (in the Include Extensions section).
- Click on the button
Addto add your options.
Contrary to tabs Include then the tab Exclude again the list of directories and file formats you don't want to appear in search results. In general, it is very simple so there is not too much to say.
+ Step 5: Now, how to activate this search engine?
Very simple, you just use the keystrokes Alt + Space, just like activating it on macOs only (Command + Space).
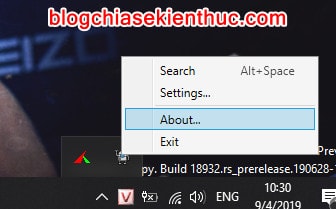
Or Alternatively, click on the Jarvis icon in the system tray on the Taskbar.
As I said above, when you activate successfully, it only shows search box only. After you type the keyword into the search box, the results appear. I quite like this kind of search.

Epilogue
So I have just detailed instructions with you how to bring Spotlight Search feature on macOs on Windows 10 already.
This is a pretty useful and simple way to bring a similar Search bar mac to your Windows 10 operating system, but you can also see the article on how to change the new search frame interface on Windows 10 1903 is similar. self.
Jarvis is also a good choice because it runs in the background, but consumes very little system resources and works very smoothly.
Hopefully this article will be useful for you. Good luck !
CTV: Nguyen Thanh Tung - Blogchiasekienthuc.com
Note: Was this article helpful to you? Do not forget to rate the article, like and share it with your friends and relatives!

0 Comments