AMP pages are the new trend of mobile responsive pages in 2020. Ads are responsible for revenue generation to site developers. WordPress is an elegant and popular content management system (CMS) among small bloggers.
Plugins play a key role in customization and saving code. You can perform different functions on your site with ease. Knowing the right plugin for your purpose is a lot of trial and error.
In this post, we are going to review about “Ads for WP – Advanced Ads & Adsense Solution for WP & AMP” by Magazine3 as an easy customizable plugin to display ads on amp pages.

What is AMP for publishers
According to google (https://amp.dev/), this is a web component framework for helping publishers improve page loading speed and readability of mobile pages. In bare bones, it removes all the JS and other resources from your non-AMP pages and makes it accessible to the user at super-fast speed.
This is targeted at making sites accessible to the user more quickly on mobile phones. There are lot of business and developer benefits with AMP pages. With fast speed, AMP pages load in milli-seconds. This improves core business metrics and user experience.
Initially they were to compete with Facebook’s Instant Articles. AMP became popular, because news sites were to appear as carousel results on smart phones. Pages with AMP contain a 3 step configuration – HTML, JS and CDN.
It enables caching mechanism. Google preloads AMP documents using a single iFrame. This happens in the background of search results pages, making sites appear to load immediately.
You can implement AMP on your WordPress site with the official plugin by AMP Project Contributors. Otherwise free plugin like AMP for WP – Accelerated Mobile Pages adds this functionality to your WordPress site.
What Ad networks are supported
We are going to use a plugin called – “Ads for WP – Advanced Ads & Adsense Solution for WP & AMP” by Magazine3 to show ads to users. The latest version of this plugin is 1.9.15.2. It has only 5000+ active installations. About 90% of the user ratings are 5 star ratings.

This plugin works for many ad networks and can include ads with cut and paste code. The following networks are supported.
1. Adsense
2. DoubleClick
3. Media.net
4. AdNow
5. MGID
6. Content.ad
7. Engageya
8. Ezoic
9. Infolinks
10. MANTIS
11. Mediavine
12. Outbrain
13. Taboola
In addition to the above, you can include different types of ads like
1. Image Banner Ad
2. Background Ad
3. Revcontent Ad
4. AMP Story Ad
5. Custom code.

How to Show Adsense Ads
The following parameters – Data Client Id, Data Ad Slot for your Adsense Ad are to be pasted in the respective fields. Then select Ad Type as Adsense, Adsense Type as Normal and select the required size. If its a responsive ad, you need to check it. AMP Compatibility needs to be enabled to display these ads on AMP pages.
How to Show Any Ads on AMP Pages
First install the Ads for WP plugin and activate it. On the left-hand side of your WordPress dashboard, Ads item is visible. The following options are available – Ads, Groups, Settings, Analytics.

- To display ads on AMP pages, click on Ads.
- Click on “Add New Ad“.

- Provide a Title for the Ad.
- Then select the ad network under Ad Type.
- For Adsense, you will be required to give the above parameters.

- You can either select Normal, Auto Ads, Sticky (Only AMP), Matched Content Ads, In-Article Ads and In-Feed Ads.

- For each parameter different options are available.
- Select Display Type.
- Following locations are supported for AMP pages.
– Shortcode(Manual), Between the Content (Automatic), After the Content (Automatic), Before the Content (Automatic), Custom Target
– Ad after Featured Image, Below the Header (SiteWide), Below the Footer (SiteWide), Above the Footer (SiteWide), Above the Post Content (Single Post), Below the Post Content (Single Post), Below the Title (Single Post), Above Related Posts (Single Post), Below the Author Box (Single Post), Ads Inbetween Loop.

- For manual method, shortcodes are supplied.
- Alignment can be done left, center, right.
- Margin or padding can be given.
- Floating ad option is also available.
Advanced Display Options
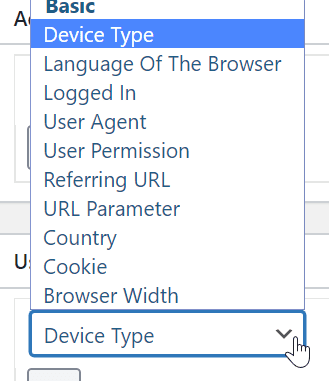
In this panel, you can select post type equal to post or page or any other custom option available. User Targeting option is also provided. It can be based on – Device Type, Language of the Browser, Logged In, User Agent, User Permission, Referring URL, URL Parameter, Country, Cookie, Browser width.

Set Expire Date
You have the following options here.
1. Set Expire Date
2. Set Specific Days
3. Expire by Impression Limit
On the right hand-side, under AMP, you have the following options.
1. AMP Compatibility
2. Non AMP Visibility.
You can disable ads on non-AMP pages and display only on AMP pages. In that way, you can have different ads for regular normal pages and other type for AMP pages. This way you can change location, user targeting etc for non-AMP and AMP pages.


0 Comments