Adding products to WooCommerce is something anyone can do, even if you are not already using WordPress. But you may still want to help to create your first product, which is what this post is focused on.
How to add products in WooCommerce
After installing WooCommerce, open your WordPress dashboard and visit WooCommerce> Products . Then click the button Create a product to create your first product.

This will launch the WordPress editor that you are familiar with but with some new additions.
Here is how to configure everything.
1. Add title and product description
Enter the name of the product in the title. Next, complete the description for your product. You want to describe (in more detail, a long description) to explain the advantages of the product. You can even use bullet points to improve the readability of this section.

When writing titles and descriptions, make sure to optimize them for organic keywords. If you want to use semantic keywords on the product page, add it to the long description.
2. Select the type of product
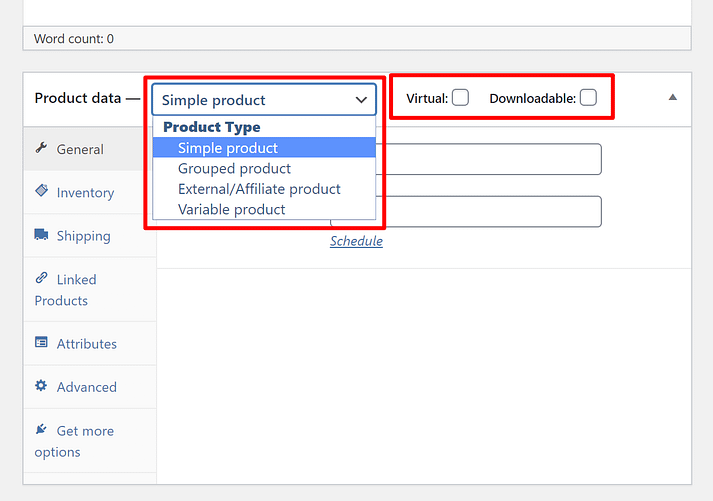
Depending on what you are selling, WooCommerce allows you to use different types of products. You can choose from four types of products:
- Simple product - That is the default. This type of product is popular among WoC Commerce web owners. For example: a hat one.
- Product group - A product grouped together to combine simple products - for example, a pack of five t-shirts.
- External products / links - If you have a dropshipping business, or an affiliate-based web, you can use this option to link the Add to cart button to an external page.
- Variable products - A product that offers many variations like colors, sizes, etc. For example, t-shirts where shoppers can choose between small, temporary, medium games, etc.
You also have two additional options to modify those four core product categories:
- Fantasy - This option is for people who are selling an online digital product that does not require shipping.
- May download - You can enable this feature if there are downloadable files associated with the product. For example, an electronic book or an audio file.
To make this choice, you can use the drop-down menu and checkboxes in the box Product data , appears right below the WordPress editor where you added the product description:
For the rest of this tutorial we will use one Simple product . The process is usually the same for other product types - you'll only get a few additional options.
3. Fill in the product data meta
Once you've selected your product type, you'll need to fill in the rest of the details in the box Product data. You can use the left tabs to navigate between different sections.
General tab

In the tab General, enter the prices for regular and promotional prices.
Selling price is when you decide to run a discount campaign. If not, shoppers will see the regular price.
Below, select a tax status - whether or not the product is taxable. If yes, select tax class.
Inventory tab

WordPress not only started as a dropshipping store, but also to create an e-commerce store based on inventory; all thanks to WooCommerce.
But if you don't see it, go to WooCommerce> Setting > Product > Inventory .
You will notice an option for stock management on the product level. If you have not tested it, then you will have to update it manually. However, if you check the box, the WooCommerce stock management system will automatically display the product.

- Enter the quantity available in the stock quantity and it will automatically update.
- Allows returning orders if the product is being manufactured and will be available soon.
- The low stock threshold will notify you when the stock of the product is below the threshold.
Shipping tab

In the tab Transport, you can control the important details about a physical product to ship.
Enter the weight of the product and size.
There is an option called shipping class. Shipping rates vary due to weight, type of service, and other reasons. The shipping group groups products based on weight limits.
For example, in a shipping class, you can group products that weigh 15 ounces together and use a specific delivery service. You can then sort the heavier ones and send them with priority mail, etc.
Product tab is linked

Affiliate products are recommended to improve store sales. There are two ways to accomplish it; You can link similar products on product pages that your customers may like (cross-selling).

Or, you can suggest more expensive products with better features, meaning adding more value to the product (upells).

In addition to the product page, you can also add upells on the checkout page.
Properties tab

Properties will help you set things like color options, sizes and more. Attributes and variants go hand in hand. To add properties, consider this guide on how to add various WooCommerce products.
Advanced tab

The detail The tab can be used to add a purchase note that appears after ordering.
You can also choose custom order locations for the item and check the box to enable customer reviews.
4. Write a compelling short description
When you fill in the box Product data , scroll down a bit into the box Short description of the Product .

Short descriptions usually appear at a prominent point on your unique product page. The longer description you have entered above will usually show up deeper, although it depends on your topic.
Here is an example of a WooCommerce description compared to a short description from the ShopIsle topic:
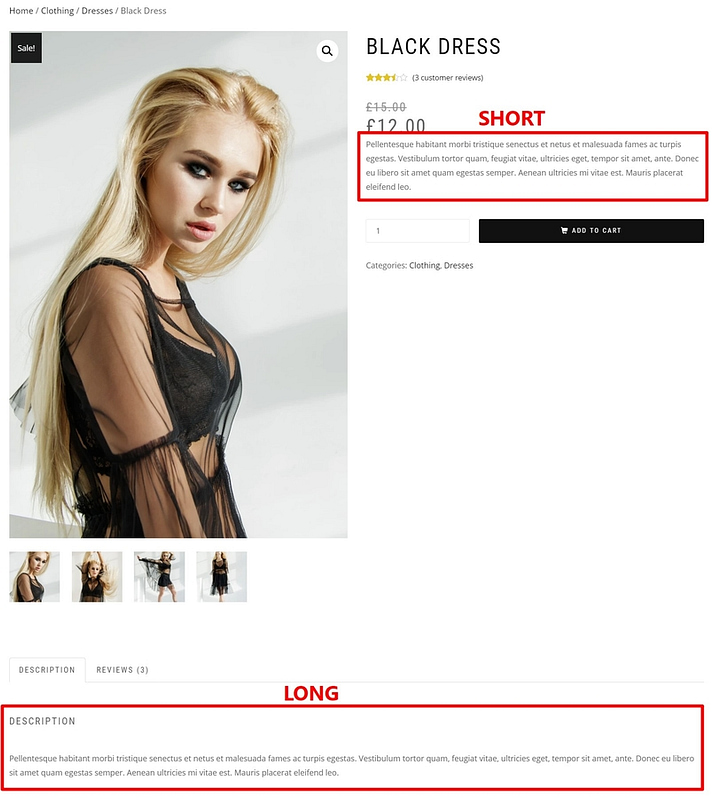
You want your short description to be 2-3 sentences and no more. Short stories are picked up by search engines more often and are essential for the SEO of your WooCommerce web. A little copy and keyword optimization will give you a great short description.
5. Add some finishing touches
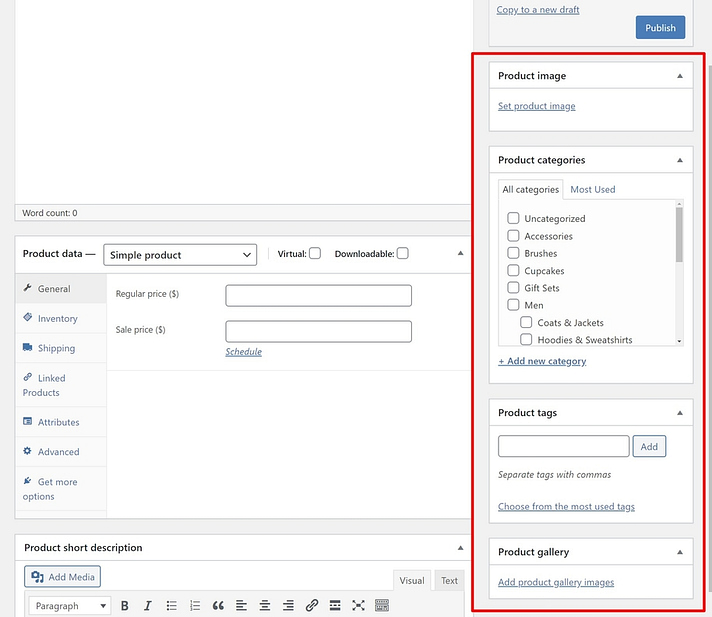
Before you publish your product, add the following with the right bar:
- Product catalog and tags - Categories and cards to help you organize your products. Your shoppers will also be able to use the categories and tags on the front of your store to find products. Try to make them sensible and helpful to your target customers.
- Product image - Add the main image of the product. This will be the largest image on the single product page and will also appear on the catalog page.
- Product collection - You can add additional images that appear in the gallery on the single product page.
6. Click the publish button
When you double check that all the product details are correct, you can press Publish to get your product working, just like you publish a blog post.
Here is an example of how your product might look on the front, although the exact design depends on your WooCommerce theme:

Once you've set up a product, you can use the same template for the next product. Just use the copy to link the new draft below the publishing box on the right bar.
Next steps to launch your website
Once you have added all your WooCommerce products, you will continue to launch your web.
Next, you might want to consider some of the best WooCommerce plugins to add important functionality to your fledgling store.

0 Comments