There is no doubt that social media has made connecting with family and friends so much easier. With the uptime all your friends, it's easy to stay close to the ones you love even when you're thousands of miles away.
However, if you don't pay for a product, chances are you bought it yourself - and Facebook has made billions in providing effective tools for advertisers using the information. Your news and browsing habits.

Over the past few years, a series of leaks and accusations have clearly shown the extreme information Facebook has gathered from its users, and they've always been the most annoyed when it comes to privacy.
Many people have started moving away from the service, but there are a few more steps you may have to take in addition to simply deactivating your profile if you want to protect your personal data.
Fortunately, Facebook has become quite transparent about the type of data it collects and also provides easy access to the tools you can use to manage that data.
Download and delete Facebook data
Follow the steps below to download and delete data from Facebook and reduce your digital footprint.
Step 1. Log in to your Facebook account on the web browser and click on the drop down menu at the top right of the screen.

Step 2. Selection Setting.

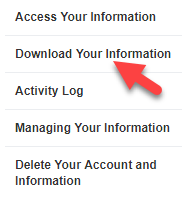
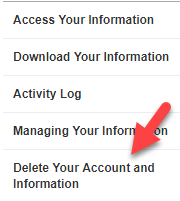
Step 3. On the left of the screen, select Your Facebook information.

Step 4. Click Download your information.
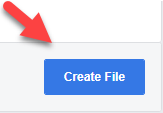
Step 5. On the next screen, click Create file.
Step 6. At this point, Facebook will give you a notification that your file is being processed. This may take a while depending on how long you have been on Facebook and how active you are on the site and on the web, but in most cases you should take more than an hour or two.

After processing the file, you will receive a notification on the website that the file is ready to download and then can download the entire file of all information that Facebook has collected. This is great for gathering the information you want to save before completely deleting your Facebook account or even if you just want to be able to easily organize the content the site has accumulated over the years.
However, while we wait for the file to be processed, we may see a few more Facebook data settings.
Step 7. Return to the previous page and click Active login.
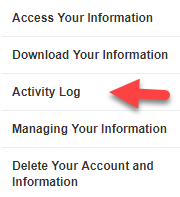
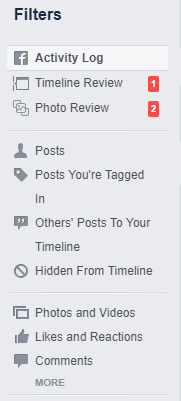
Step 8. This page is a collection of all your activities and interactions with the site. You will see all your posts, comments and even responses to each post on the site. To make sorting easier, you can select the data you want to see using the Activity Log Filter on the left side of this page.
Step 9. Besides any activity, you will see two different icons. The icon on the left allows you to see who is the specific item displayed and the icon on the right allows you to delete specific items from your logs. This is great if there are specific photos or posts that you can't float on the web but are okay with managing the data in general.
Step 10. In case you can completely delete your account and all information related to that account, that's also an option! Return to the Facebook Information screen and click Delete your account and information.
Step 11. The next screen gives you some information about what happens when you confirm the settings, as well as some other options like simply turning off Facebook to keep access to Messenger. If you like to cut off Facebook completely, tap Delete the account at the bottom right of this window.
Just make sure you are 100% positive that you want to permanently delete the account and data, because there, there is no return after this point in the process. We strongly recommend that you at least download your Facebook information through the process in steps 4-6 so that you have a copy of any memories you want to keep in the future.

Overall, although Facebook certainly has encountered a bit of shady when it comes to how they handle their user data, they will grant you access to that data if you can do a little bit of work. digging.
One thing worth mentioning that many users don realize is that Instagram's rival social network is also owned by Facebook. So if you're looking to erase your data entirely from corporate servers, you should also avoid using that app.
It is certainly inconvenient to have to cut off two of the biggest social networks on the web, but for those who want to have greater control over the way their personal information is used, it is well worth a few hours. to view data collected and ensure you have as much information as possible. Enjoy!

0 Comments