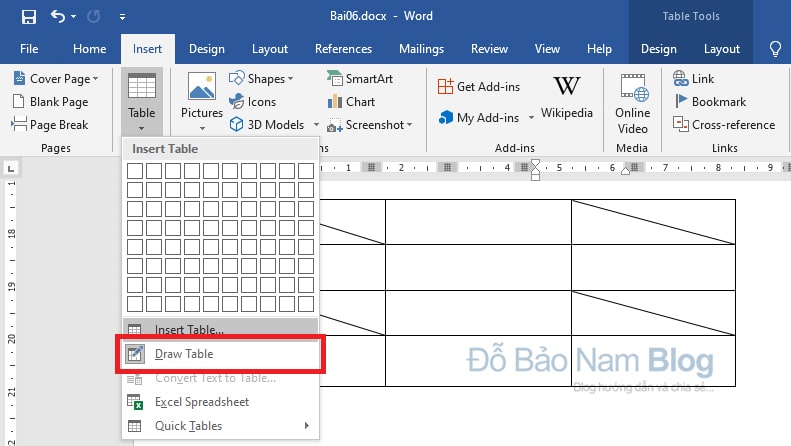
Create tables in Word is one of the very common operations when using this software. This is one of the basic operations in Word that is used frequently in study and work. If you have mastered this software, then manipulating the table in Word will become simple. But, for most of you who are new to this software, sometimes the operation will meet certain difficulties.
However, do not worry. Because How to create a table in Word pretty simple. And on different versions of Word, this will be the same. Therefore, you do not need to worry that you are using Word 2010, 2013, 2016, 2019 ... As long as you understand the basic steps, no matter what version you will not be a problem. And to help you understand this operation more quickly, Do Bao Nam Blog has fully prepared images, illustrated videos in the content below ...
Video sharing how to create tables in Word 2010, 2013, 2016, 2019 ...
Versions from Word 2013 onwards have a very similar interface. So, on these versions there is almost no difference when you want to draw tables in Word. With older versions such as Word 2010, 2007…, although the interface is a little different, but the steps are still similar.
And in the video below, Do Bao Nam Blog is working on the Word 2019 version. This is the version of Word that is very commonly used at the moment. And this version interface is quite similar to versions from Word 2013 onwards. So if you are interested in how to create a table in Word 2016, 2013, or later versions of Word, then the operation is done like in the video below.
In this video, Do Bao Nam Blog shares with you 03 table layout in Word often used and simplest. Depending on each specific case, you can choose the right methods. But, the first one in the video is the one most used. And for detailed reference on these ways, you can watch in the following video:
Instructions on how to create a table in Word in detail through pictures
In the following content, Do Bao Nam Blog will fully share common ways to draw tables in Word. You can enter the exact number of rows and columns. Then you plot it according to that parameter. Or, you can draw with a table drawing tool in Word ... details of these ways you can refer to the following content:
See more: Keyboard shortcuts commonly used in Word
The fastest way to create tables in Word on any version
This method is applicable on all versions of Word. You can enter the exact number of rows and columns as you like. Or, you can choose the number of rows and columns with the mouse. Steps to Draw a table in Word In this way you do the following:
Step 1: Select the location to insert the table into the Word file. You just need to put your mouse in the place where you want to insert it. Then, click Insert on the menu. And click on Table.
Step 2: Select the number of rows and columns to be plotted. In this step 2 you have 2 options. You can mouse over the squares to choose the number of rows and columns. Then, you left click to select. Or, you can click on Insert table at the bottom, then enter the exact row and column number. Then click OK.

How to create a table in Word with the Draw Table tool
Actually, you still need to follow step 1 above. Then, instead of quickly selecting the number of rows and columns, you click Draw Table. This approach is rarely used, and is often used when you are creating simple tables. After clicking on Draw Table, then your mouse will switch to pen shape.
And to draw the board, you simply click on the starting point where you want to draw. Then hold the left mouse button, move the mouse to draw. Release the left mouse button after you have drawn the required size. This method is very suitable when you want to split one or more cells in the table. You can also use this method to draw a diagonal line in a cell ... And to exit this command, just press ESC.
Like that Draw a table in Word done. The rest you enter the content for the table. At the same time, you must adjust the width of rows, columns, or cells ... In addition, you can also format tables, such as fill colors, create styles for tables ...

The article How to create a table in Word & related operations when the table first appeared on the day Do Bao Nam Blog.


0 Comments